Using Journal Templates
The following OPplus General Journal Templates are created by the initial setup [see chapter Generate OPplus Setup Entries]:
CASH – Cash Book Journal: The CASH Gen. Journal Template is assigned to the Pmt. Import → Cash Book Journal menu item. For more information on the cash book journal functionality, please refer to chapter Cash Book Journal functionality.
CHECK – Check Receipt Journal: The CHECK Gen. Journal Template is assigned to the Pmt. Import → Check Receipt Journal menu item. For more information on the check receipt journal functionality, please refer to chapter Check Receipt Journal functionality.
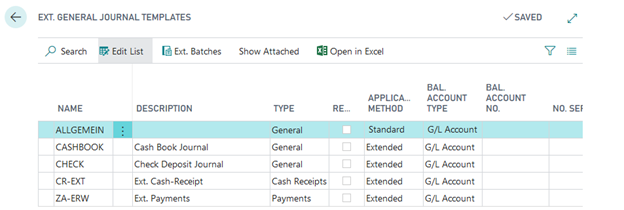
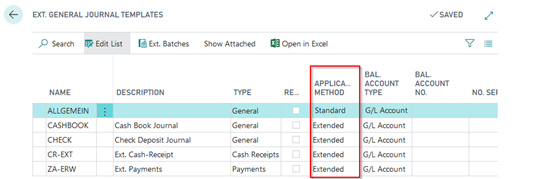
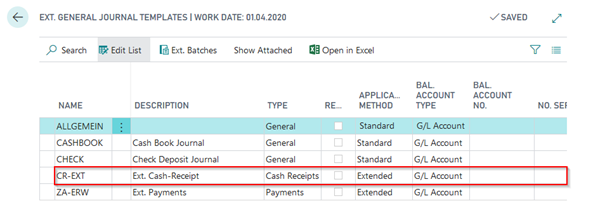
CR-EXT – Ext. Cash Receipt Journal: The CR-EXT Gen. Journal Template is assigned to the Pmt. Import → Ext. Cash Receipt Journal menu item. The Bank Import, the Extended Application and the Easy Match are available via this general journal template. However, the setup data only sets it to default. But you can change this:
For more information on the extended cash receipt functionality, please refer to chapter Ext. Cash Receipt Journal (journal functionalities).
ZA-ERW – Ext. Payment Journal: The ZA-ERW Gen. Journal Template is part of the OPplus Payments module.
Warning
You should not set the standard payment journals to the extended application method since the options available in the extended application for the payment discount area are not used in the standard application. By selecting the Template button, you can open the list of associated general journal batches for the respective template.
Journal Batches
You can set up the following parameters for each extended general journal batch:
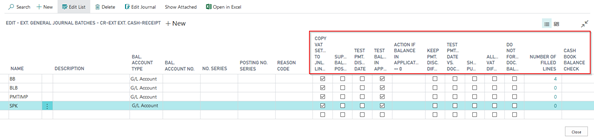
Suppress Balance Posting: If you leave the Extended Application window by clicking OK even though a balance exists between the assigned invoices and the payment, the difference will be copied into a new general journal line. If you want to suppress this behavior, activate this field.
Number of Filled Lines: This field shows the number of the journal lines which have a filled Description field.
Test Balance in Application: If you leave the Extended Application window by clicking OK even though a balance exists between the assigned invoices and the payment, you must first confirm the difference (provided that this field contains a check mark) before you can leave the application.
Test Pmt. Discount Date: Here you can define the presetting for the “Pmt. Discount Date” field in the Extended Application window. Irrespective of the setting used during the application, the "Pmt. Discount Date" field will be filled with this preset field each time you perform application. If this field is activated, the system checks during the automatic application whether the payment is received within the payment discount date. If the payment is executed outside the payment discount date, the application does not take any payment discount amount.
Action if Application Balance <> 0: Here, unlike the OPplus Pmt. Import Setup, you can determine the actions to be performed by the system if you have an application balance in the Ext. Application. With the “Blank“ option, the pmt. import setting will be based on. With the “Standard“ option, a new line will be created according to OPplus standard. For the “Advanced“ option, a corresponding options window will appear which can be used to determine how to proceed with the balance.
Keep Pmt. Discount Difference: Here you can define the presetting for the “Pmt. Disc. Difference” field in the Extended Application window. Irrespective of the setting used during the application, the "Pmt. Disc. Difference" field will be filled with this preset field each time you perform application. This field is related to the field "Test Pmt. Discount Date". If both fields are activated, a supposed payment discount difference is deducted from the payment amount and the cash discount amount remains as open. This means that these two fields should always be activated if the payment always has to be within the payment discount period and payment discount is not accepted as goodwill.
Test Pmt. Discount Date vs. Doc. Date: The payment discount date is normally checked against the payment's posting date which in general equals the payment's posting date. If the dates are not equal and you want the system to check the payment discount date against the document date, activate this field.
Do not force Doc. Balance: In standard BC, the system checks the balance per posting date, document type, and document number. When importing a payment advice via OPplus, you can use the “One Bal. Account per Register“ option to get a separate document number for each line in the Pmt. Import Interface. With the “Do not force Doc. Balance“ option, the system will check per posting date and document type in the journal. That means you could post the following general journal:
Subsequent processing in the General Journal
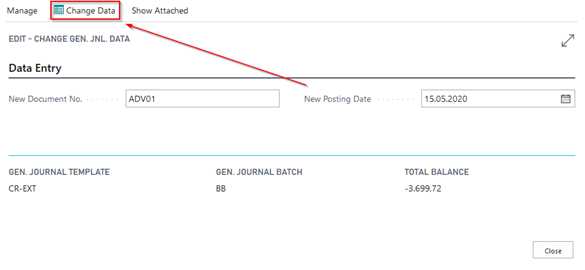
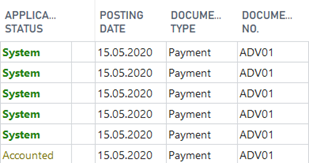
You can use the Subsequent processing function in the general journal if you want to use a single document number for the entire general journal instead and, if necessary, also change the posting date:
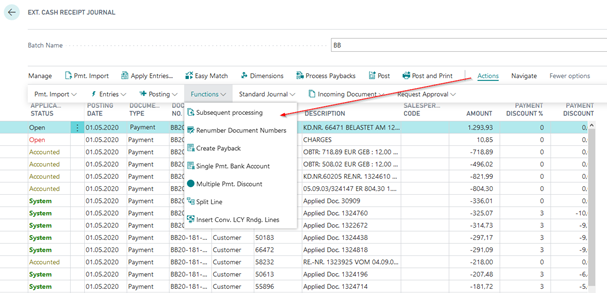
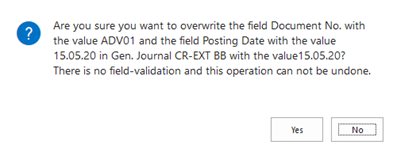
In the window that opens you can enter the new data. By clicking on Change data button the general journal can be edited: