OPplus extended lists and reports
This chapter describes how to set up and use the Extended List and Reports module. This module offers the following functionalities:
- Optimized display of entries for each G/L account on the screen
- Optimized display of (open) entries for each customer/vendor on the screen and in reports
- Use of entry comments for each entry of your G/L, customer and vendor accounts
Version
This manual describes the contents of the OPplus version 15.00.
Extended Lists and Reports Setup
The Extended Lists and Reports Setup window has to be filled for every company managed with Microsoft Dynamics™ Business Central.
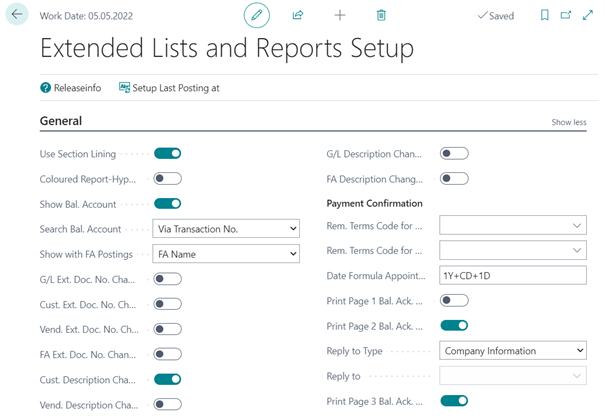
This part describes the fields in the Extended Lists and Reports Setup window. In order to open the window, click on “Other Setups” → “Extended Lists and Reports Setup” in the “Actions” part.
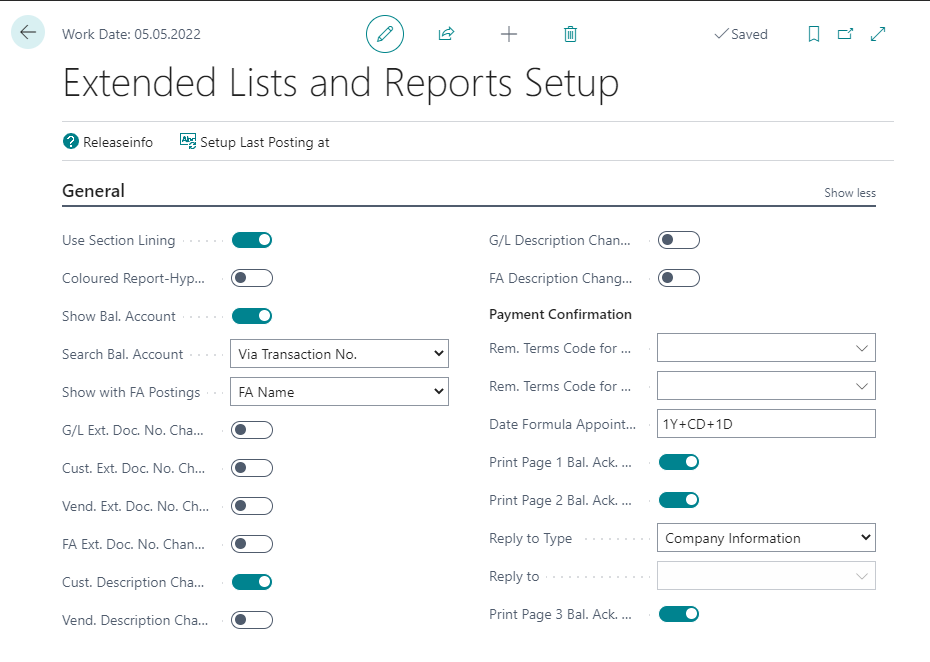
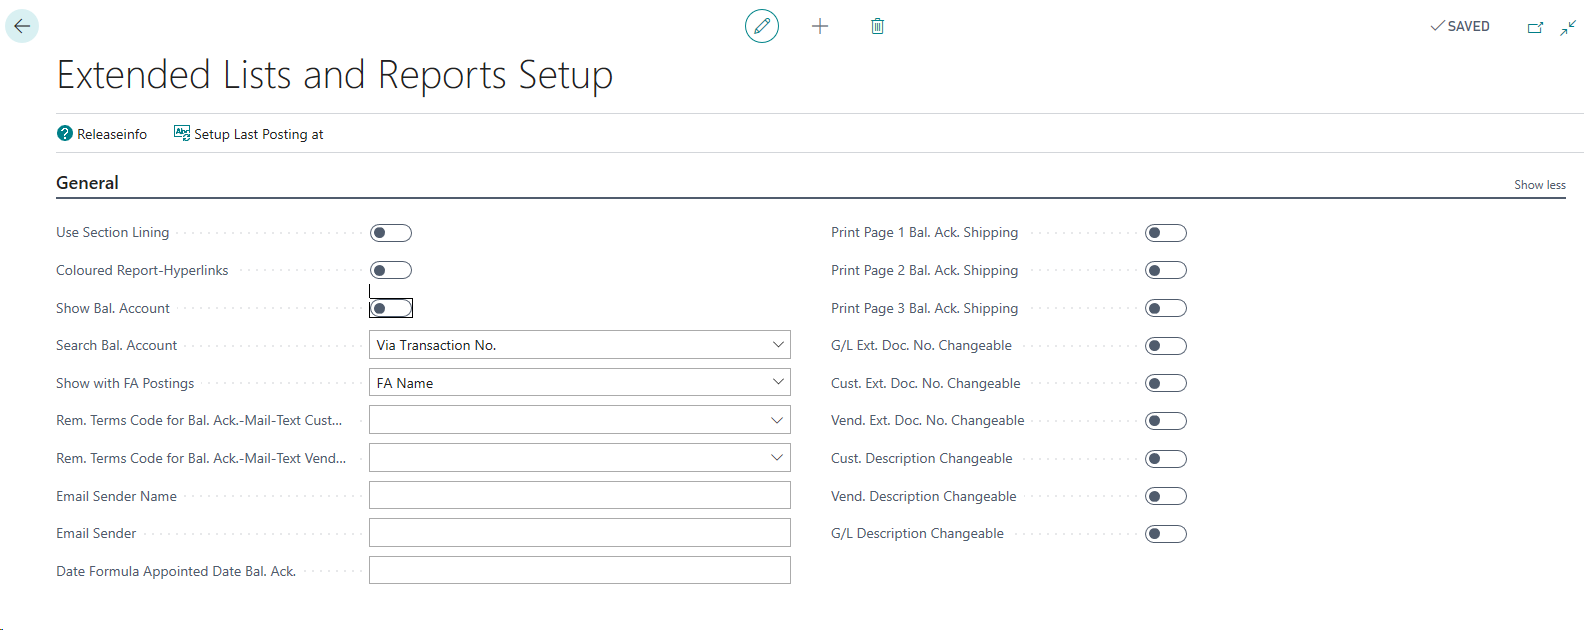
On the General tab of the Extended Lists and Reports Setup window, the following options can be specified:
| Option | Description |
|---|---|
| Use Section Lining | If this field contains a check mark, each second line of the printed trial balance is highlighted in grey in order to improve readability of each single line. |
| Show. Bal. Account | If this field is activated, the balancing accounts are shown in the preview of the extended entries. If the system finds more than one balancing account, the system will use “VARIOUS” as balancing account. The balancing account name will then consist of the balancing account numbers separated by a semicolon. If there is not enough space the list will terminate with dots. |
| Search Bal. Account | In this field it can be specified by which information the system should search for the balancing account. The options are “Transaction“ or “Document No.“ |
| Show with FA Postings | If the option “Balancing Account“ is selected in this field, the contents of the “Balance Account“ and “Bal. Account Name“ fields will be shown based on the G/L entry value of the “Bal. Account No.“ field. If the option “FA Name“ is selected in this field, the fixed asset number will be shown in the “Bal. Account“ field and the fixed asset name in the “Bal. Account Name“ field for two-line postings (e. g. “Calculate Depreciation“ batch job). Note: One-line postings are always performed based on the logic of the option “Balance Account”. |
| Rem. Terms Code for Bal. Ack.-Mail-Text Customer | This field contains the reminder terms code from which the texts for the Email addressed to customers will be used. If the field is empty there will appear an error message upon creation. |
| Rem. Terms Code for Bal. Ack.-Mail Vendor | This field contains the reminder terms code from which the texts for the Email addressed to vendors will be used. If the field is empty there will appear an error message upon creation. |
| Email Sender Name | This field contains the sender name which will be used upon creating the Email. |
| Email Sender | This field contains the sender’s Email address which will be used upon creation the Email. |
| Date Formula Appointed Date Bal. Ack. | An appointed date is needed for the balance acknowledgement. This field contains the date formula to calculate the appointed date based on the work date. Example with the last day of the previous year as appointed date “-1Y+CY-1D“. |
| Print Page 1 Bal. Ack. Shipping | If this field is check marked, the first page of the balance acknowledgement (address letter) will be printed. At least one check mark must be selected. |
| Print Page 2 Bal. Ack. Shipping | If this field is check marked, the second page of the balance acknowledgement (entries) will be printed. At least one check mark must be selected. |
| Print Page 3 Bal. Ack. Shipping | If this field is check marked, the third page of the balance acknowledgement (reply letter) will be printed. At least one check mark must be selected. |
| G/L Ext. Doc. No. Changeable | If this field is check marked the External Document Number on the G/L Entry Card can be modified as long as the entry is open. |
| Cust. Ext. Doc. No. Changeable | If this field is check marked, the External Document Number on the Customer Entry Card can be modified as long as the entry is open. |
| Vend. Ext. Doc. No. Changeable | If this field is check marked, the External Document Number on the Vendor Entry Card can be modified as long as the entry is open. |
| Cust. Description Changeable | If this field is check marked, the Description on the Customer Entry Card can be modified as long as the entry is open. |
| Vend. Description Changeable | If this field is check marked, the Description on the Vendor Entry Card can be modified as long as the entry is open. |
| G/L Description Changeable | If this field is check marked, the Description on the G/L Entry Card can be modified as long as the entry is open. |
| Return letter to type | Here you define to whom the return letter should be addressed. |
| Return letter to | Here you enter the contact or vendor. To whom the return letter should be sent. This field refers to the previous field. |
All fields are deactivated by default!
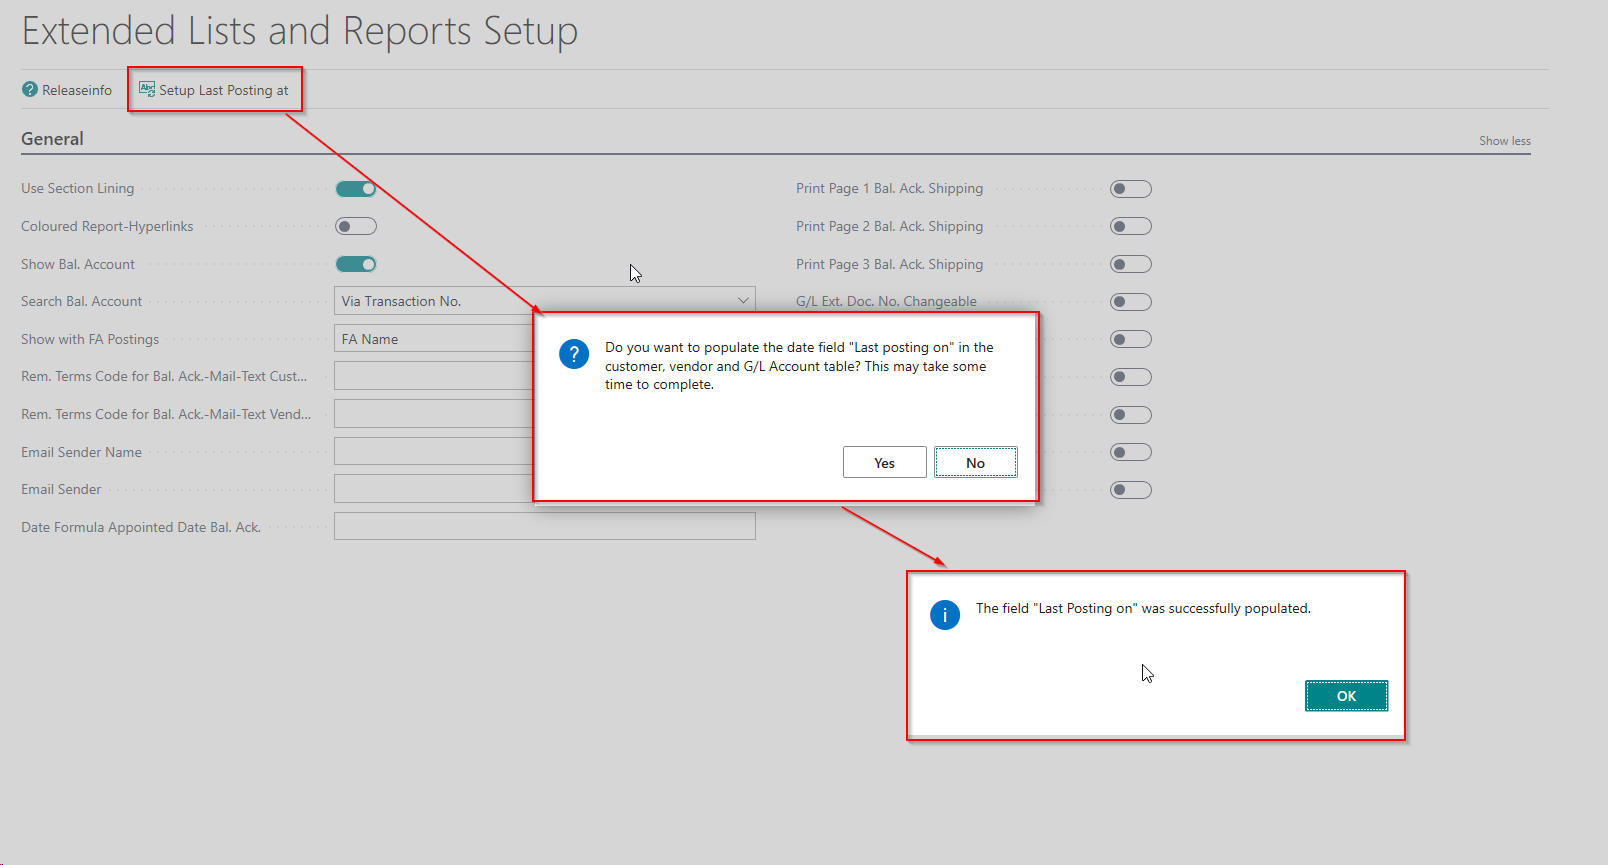
The OPplus system provides the “Last Posting at“ field which requires initial setup. There is a new function “Setup Last Posting at“ in the Extended Lists and Reports Setup. Once the request is confirmed the accounts will be populated accordingly.
Extended General Ledger Entries
In the following section only the differences compared to the standard display of G/L entries are described. The extended general ledger entries are shown in a window which consists of a header and a line area: The header contains the number and description of the G/L account. The lines show the individual entries. The window contains a number of additional fields and functions which are not available in the standard application.
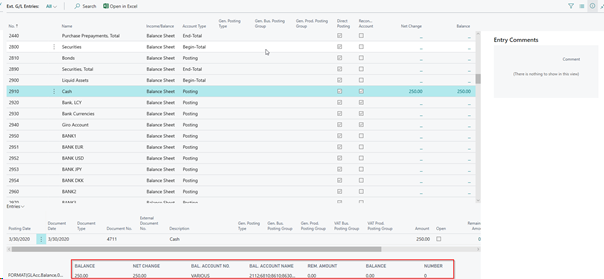
In the footer the following additional fields are to be found:
| Option | Description |
|---|---|
| Balance | This field shows the actual balance of the G/L account. |
| Net Change | This field shows the net change of the account balance for the period specified in the Date Filter field. |
| Bal. Account Number | This field shows the numbers of the balancing accounts associated with the selected record. |
| Bal. Account Name | This field shows the names of the balancing accounts associated with the selected record. |
| Rem. Amount | This field is populated if “Calculate Sum” in Entries is selected. |
| Number | This field is populated if “Calculate Sum” in Entries is selected. |
The number and name of the balancing account are only shown if the “Show Bal Account“ field in the Extended Lists and Reports Setup window is activated.
Furthermore, the following menu items offer helpful functionalities:
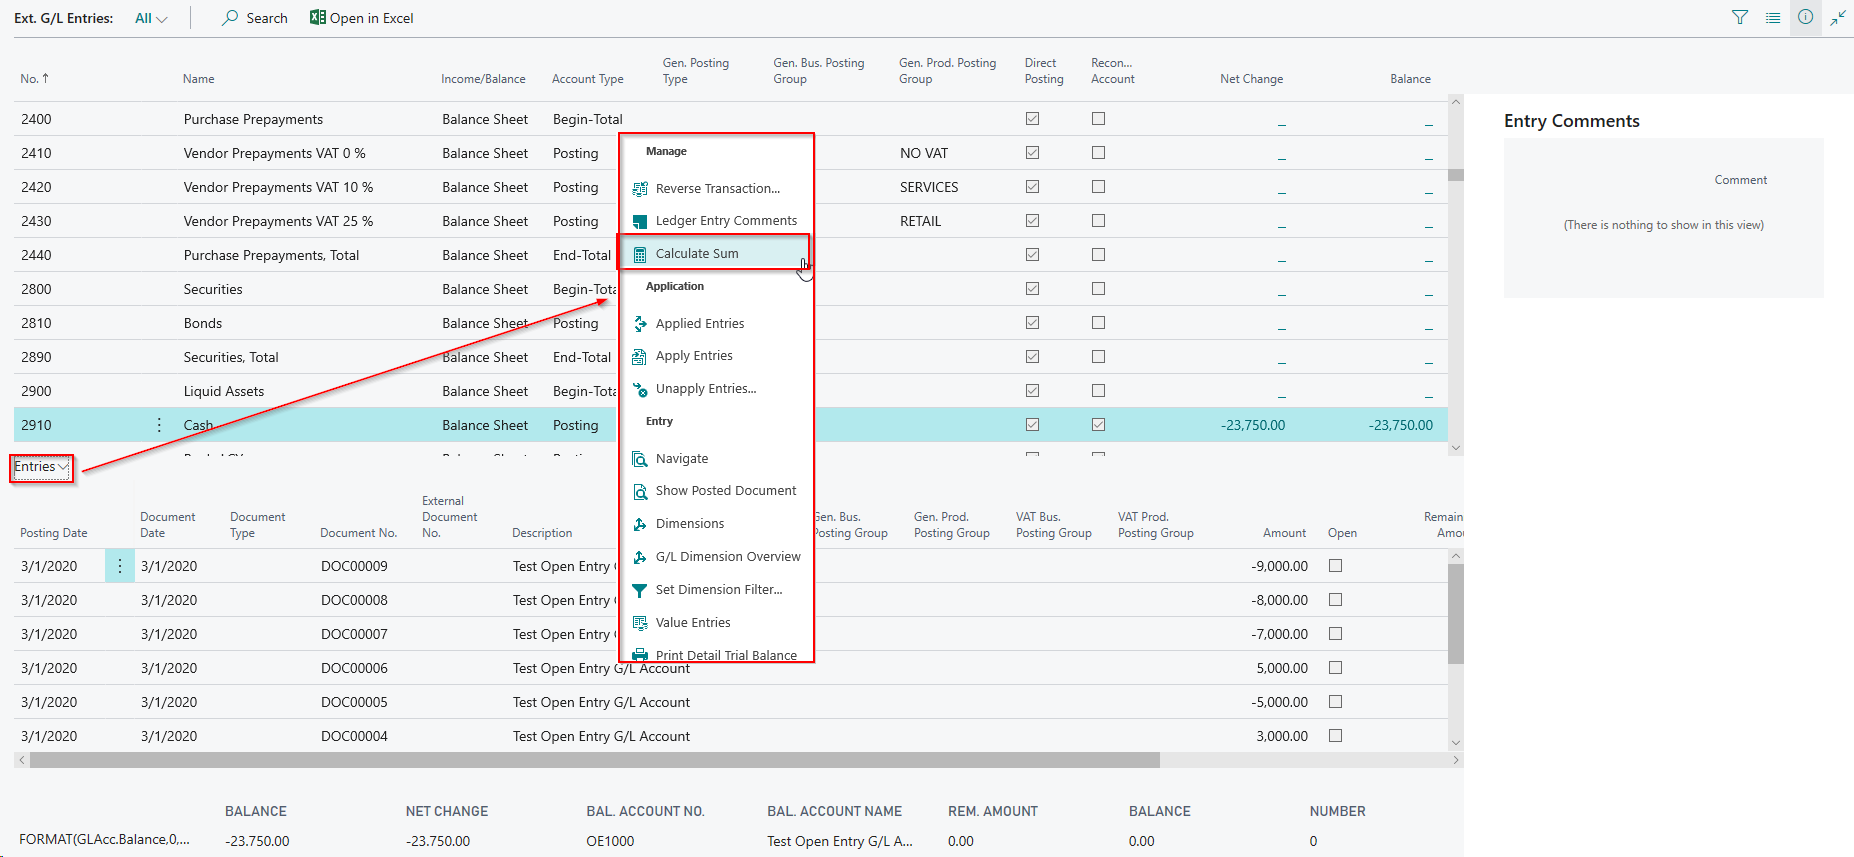
Calculate Sum: Function “Calculate Sum“ – If this function is selected under the menu item “Entries“, the total of the selected entries will be calculated and shown in the footer in the field “Balance“.
Show Posted Document: Function “Show Posted Document“ – If this function is selected under the menu item „Entries“, the system will look for a purchase or sales document based on the document number. If a document is found, it will be immediately displayed on the screen.
Print Detail Trial Balance: Function “Print Detail Trial Balance“ – If this function is selected under the menu item “Entries“, the Ext. Detail Trial Balance report will be opened, prefiltered on the G/L account number.
The following additional fields are available on the lines:
| Option | Description |
|---|---|
| Entry Comment | This field indicates if a comment exists for this entry. More information can be found in chapter Extended Lists and Reports → G/L Entries → Ext. G/L Entries → Ledger Entry Comments |
| Remaining Amount | This field shows whether the entry has been paid completely or whether there is a remaining amount open. A check mark in this field indicates that the entry has not yet been completely applied. This field is only available if the G/L Open Entries module is licensed. |
| Open | This field shows the remaining amount which has to be applied before the entry itself is completely applied. The remaining amount is automatically calculated upon posting and will be updated every time an application is posted. This field is only available if the G/L Open Entries module is licensed. |
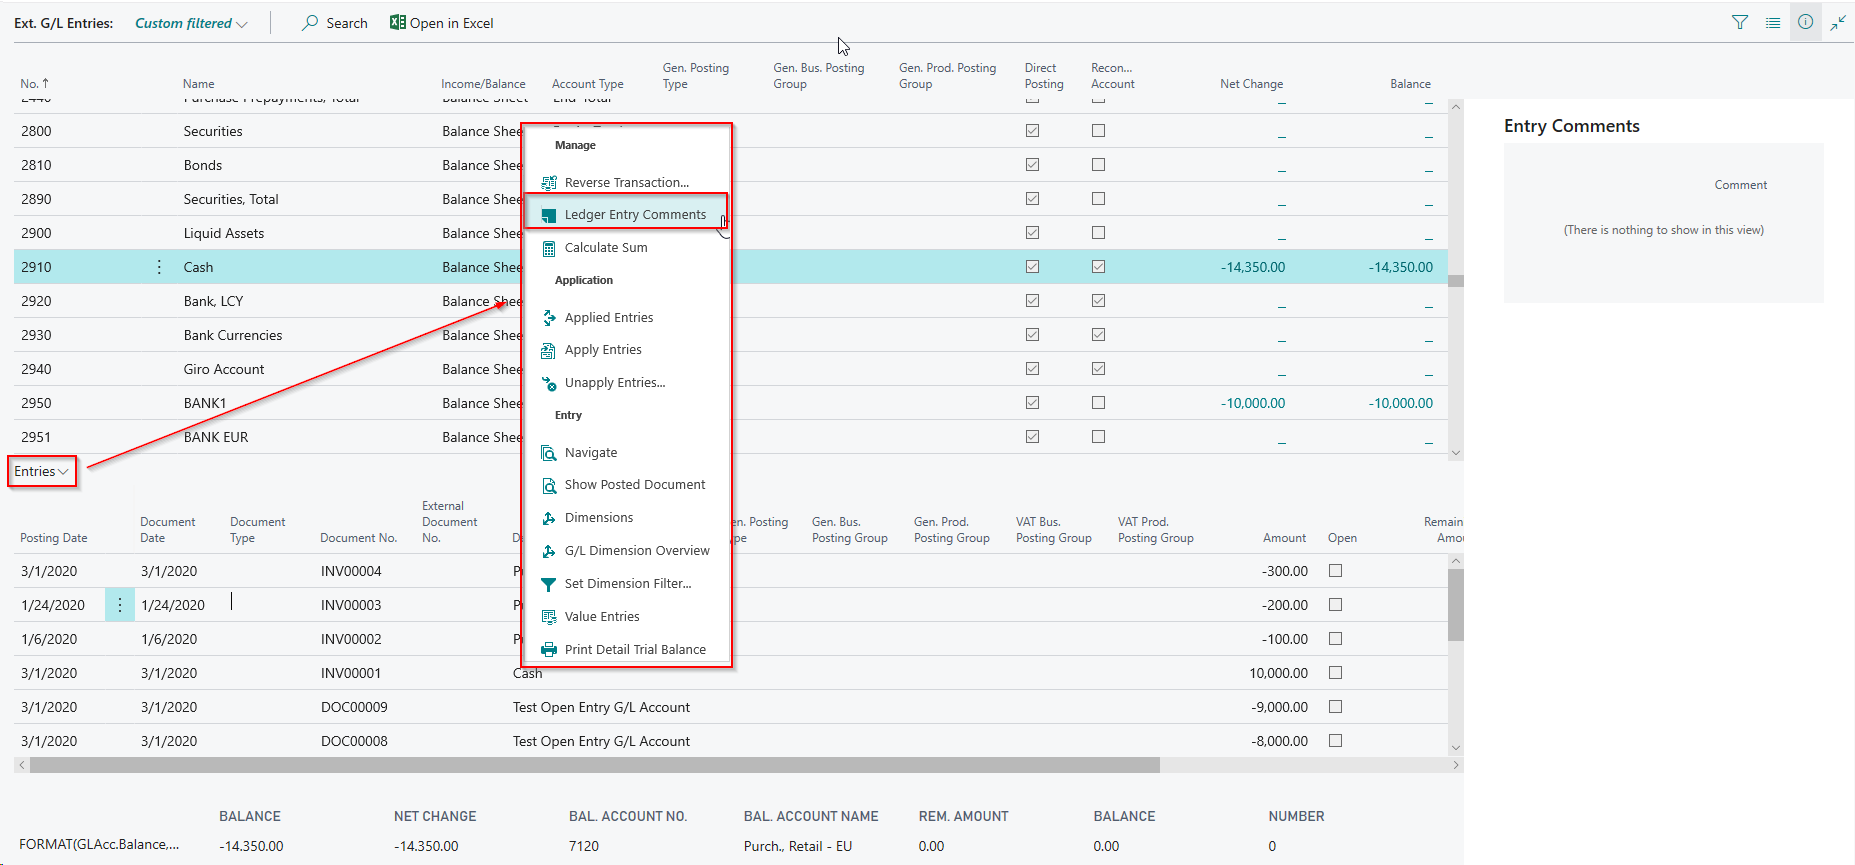
Practical Tip: Display of Ext. G/L Entries for a Specific Period
When you enter a date filter in the “Filter totals by” field, only the G/L entries of this specific period will be shown in the lines.
Example: Only G/L entries posted between 01/06/20 and 01/31/20 shall be displayed.

If the filter is confirmed with Enter, only the filtered G/L entries will be shown:

The Net Change field now shows the value of the period specified in the date filter.
By clicking another G/L account it is possible to browse between the G/L accounts for which only the G/L entries specified in the date filter in the Filter totals by field are shown.
Warning
Please note that a date filter set in the Filter totals by field will not be kept by the system once the window is closed and reopened. If required the filter has to be set again.
An additional set Filter totals by with the cursor on the line will only affect the “Remaining Amount” field. This field is only available if the G/L Open Entries module is licensed.
G/L Ledger Entry Comments
With the Extended Lists and Reports module it is possible to modify the contents of certain fields as well as to add additional comments for each ledger entry.
Ledger Entry comments can be found under Entries → Ledger Entry Comments:
The following page will be opened consisting of the header and the comment lines:
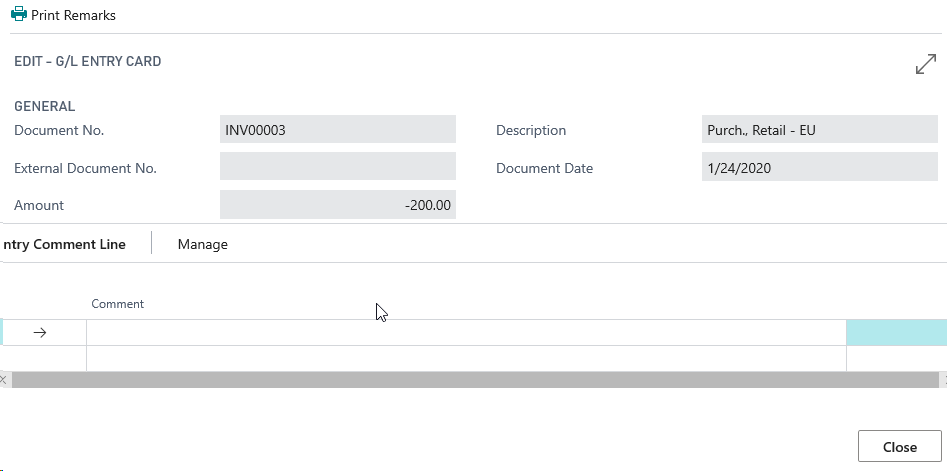
| Option | Description |
|---|---|
| Document No. | This field shows the ledger entry’s document number. The content of this field cannot be modified. |
| External. Doc. No. | This field shows the ledger entry’s external document number. The content of this field can be modified, depending on the setup. The external document number will only be modified in the corresponding G/L entry! |
| Amount | This field shows the ledger entry’s amount. The content of this field cannot be modified. |
| Description | This field shows the ledger entry’s description. The content of this field can be modified. |
| Document Date | This field shows the ledger entry’s document date. The content of this field cannot be modified. |
| Comment | Comment text can be entered here. Once a comment text has been entered, the Entry Comment field of the G/L entry will show the value “Yes“. |
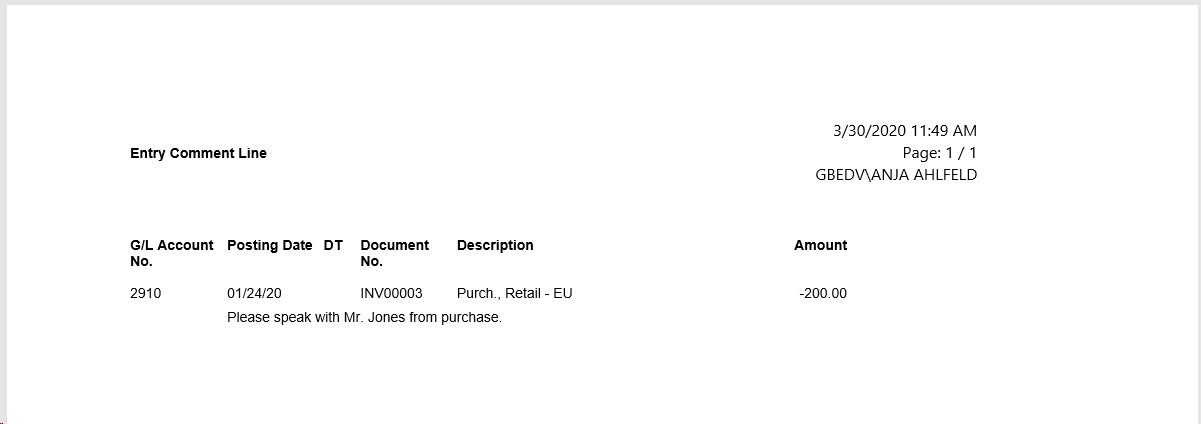
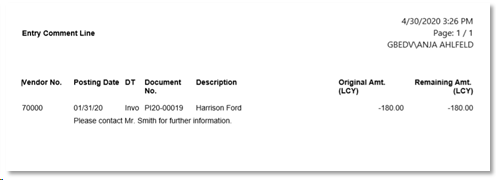
The entry comment can be printed via the menu item “Print Remarks“:
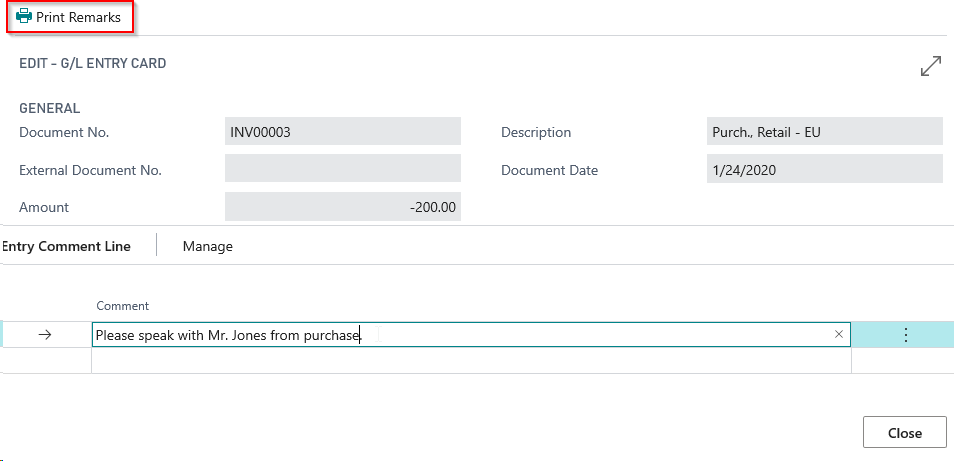
The report Entry Comments will open, filtered on the selected G/L entry:
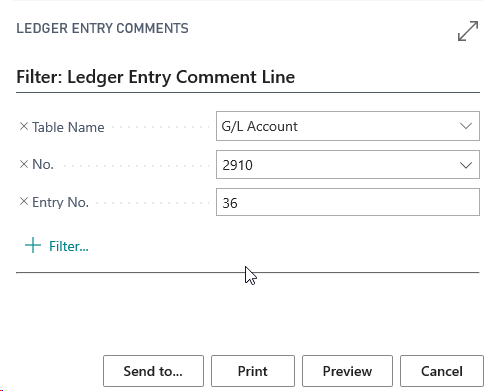
Preview example:
Ext. Detail Trial Balance
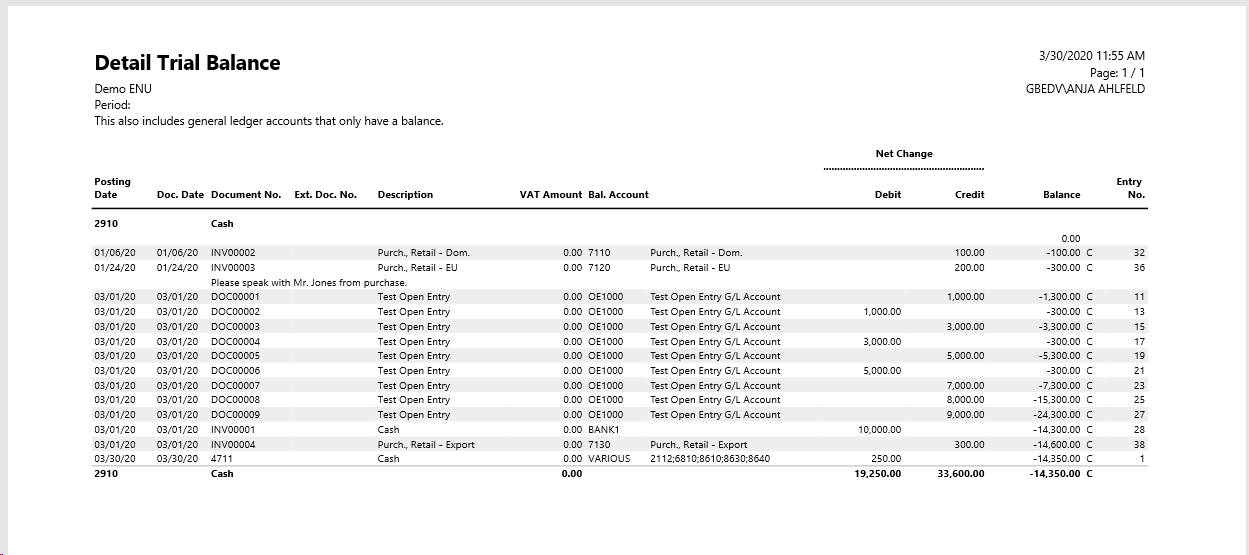
With the Extended Lists and Reports module each second line of the printed Ext. Detail Trial Balance can be highlighted. This feature can be specified in the Extended Lists and Reports Setup.
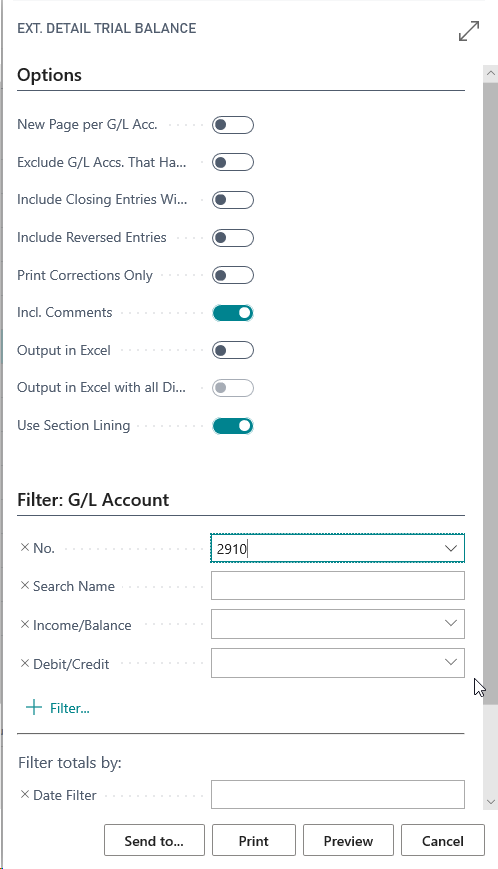
Preview example:
G/L Accounts
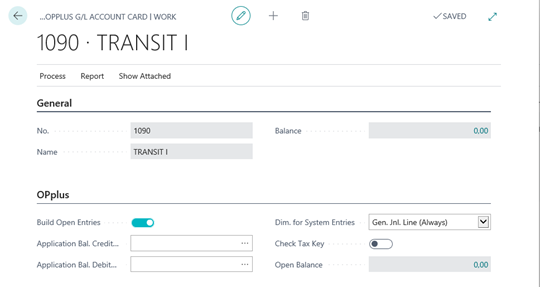
The “Last Posting at“ field is integrated in the G/L accounts. It will be updated provided there has been a posting for a G/L account which generates entries. There is the possibility to filter directly on G/L accounts which e. g. have been active in the last year.
The initial setup in the Extended Lists and Reports Setup has been extended respectively.

Customers
The Ext. Customer List window will open upon entering Alt Q and then “Ext. Customer“.
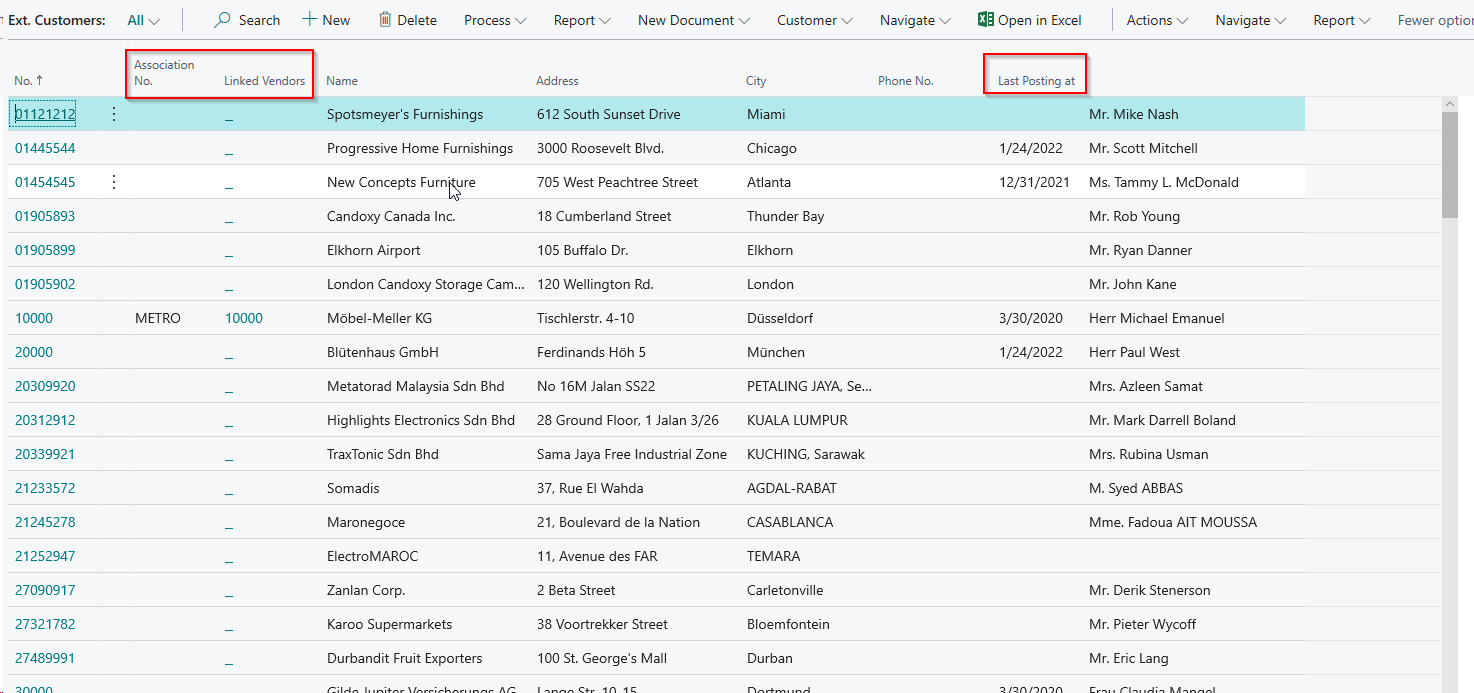
This page is based on the standard application enhanced by the columns “Association No.“ and “Linked Vendors“. The corresponding information will be shown if the OPplus Association module is licensed and activated.
The “Last Posting at“ field is also integrated in the customers. It will be updated provided there has been a posting for a customer, which generates entries. There is the possibility to filter directly on customers which e. g. have been active in the last year.
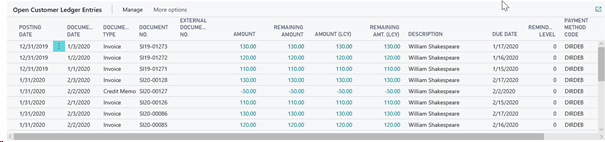
Clicking Customer → Entries will open the Ext. Customer Ledger Entries window filtered on the selected customer.
Ext. Customer Ledger Entries
If the window is opened via Views and Lists Ext. Customer Ledger Entries an unfiltered view of all customer ledger entries will be shown.

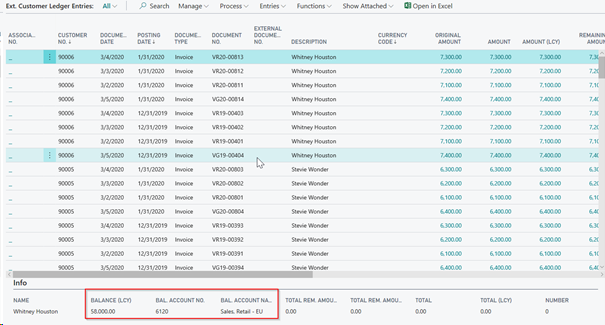
In addition to the field Association No. the following fields are available in the footer:
| Option | Description |
|---|---|
| Name | This field shows the customer’s name for the selected record. |
| Balance (LCY) | This field shows the customer’s balance for the selected record in local currency. |
| Bal. Account No. | This field shows the number of the related balancing account for the selected record. |
| Bal. Account Name | This field shows the name of the related balancing account for the selected record. |
The Bal. Account No. and Bal. Account Name fields are only available if the Show Bal. Account option is activated in the Extended Lists and Reports Setup.
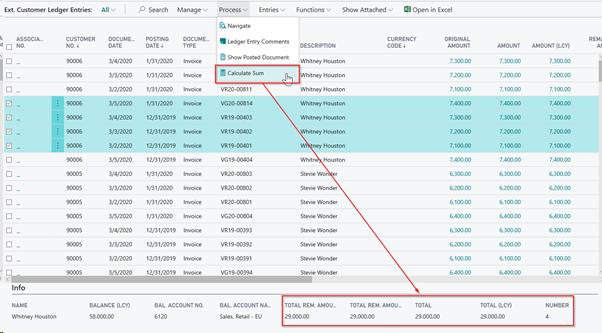
More useful functions are to be found under the menu item “Process“.
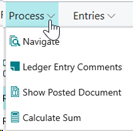
Navigate: Clicking this menu item will activate the Business Central functionality “Navigate”.
Ledger Entry Comments: Under this menu item Ledger Entry Comments for the selected customer will be shown.
Show Posted Document: This menu item will let the system look for a sales document based on the document number. If the document is found it will be displayed immediately on the screen.
Calculate Sum: By clicking this menu item the total of the selected entries will be calculated and shown in the Total field.
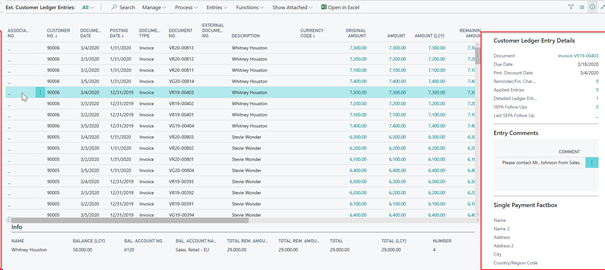
On the right-hand side of the display there is a fact box showing any existing entry comments as well as a fact box for single pmt. bank accounts (only visible if the Payments module is licensed).
Customer Ledger Entry Comments
With the Extended Lists and Reports module certain fields per customer ledger entry can be modified and additional comments can be captured.
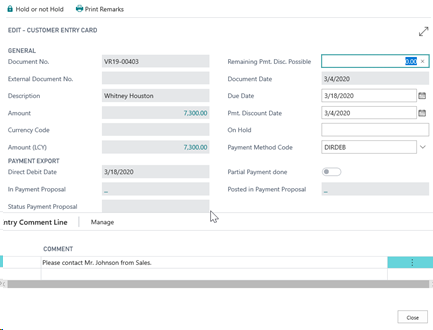
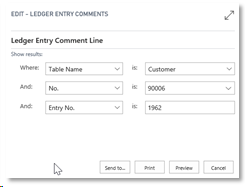
The customer ledger entry comments can be opened by selecting Ext. Customer Ledger Entries → Process → Ledger Entry Comments:
| Option | Description |
|---|---|
| Doc. No. | This field shows the entry’s document number. The content of this field cannot be modified. |
| External Doc. No. | This field shows the entry’s external document number. The content of this field can be modified depending on the setup of the Extended Lists and Reports Setup as long as the entry is open. The external document number will only be changed in the related customer ledger entry! |
| Amount | This field shows the entry’s amount in original currency. The content of this field cannot be modified. |
| Currency Code | This field shows the currency code of the related entry. The content of this field cannot be modified. |
| Amount (LCY) | This field shows the entry’s amount in local currency. The content of this field cannot be modified. |
| Remaining Pmt. Disc. Possible | This field shows the entry’s possible remaining payment discount. The content of this field can be modified as long as the entry is open. |
| Description | This field shows the entry’s description. The content of this field can be modified depending on the setup of the Extended Lists and Reports Setup. |
| Document Date | This field shows the entry’s document date. The content of this field cannot be modified. |
| Due Date | This field shows the entry’s due date. The content of this field can be modified as long as the entry is open. |
| Pmt. Discount Date | This field shows the entry’s payment discount date.The content of this field can be modified as long as the entry is open. |
| Direct Debit Date | This field shows the calculated direct debit date. |
| In Payment Proposal | If the entry is part of a payment proposal the corresponding payment proposal number will be shown in this field. By clicking this field the respective payment proposal will open. |
| Mandate ID | This field shows the mandate ID to be used with a direct debit. |
| Status Payment Proposal | This field shows the status of the payment proposal if the entry is currently used in a payment proposal. |
| Partial Payment done | This field contains a check mark if the entry has already been posted in a payment proposal with a remaining amount unequal to zero. |
| Posted in Payment Proposal | If the entry is currently part of a posted payment proposal, the corresponding payment proposal number will be shown in this field. By clicking this field, the posted payment proposal will be opened. If the entry has already been posted in several payment proposals, a corresponding list of filtered posted payment proposals will be shown in this field. |
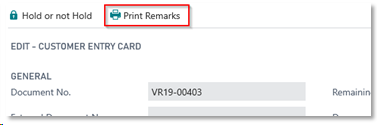
By selecting “Print Remarks“ the entry comments can be printed:
The Ledger Entry Comments report will open with a filter on the selected customer ledger entry:
Preview Example:

Open Customer Ledger Entries
The Extended Lists and Reports module offers an optimized display of open entries.
The extended customer ledger entries are shown in a page consisting of information in the header and the display of the open entries in the subpage.
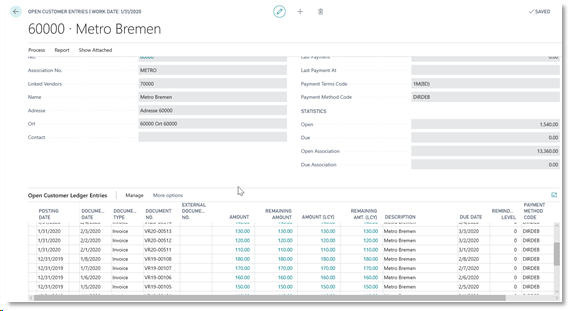
Open Customer Ledger Entries -Header: The following fields among others are shown in the header:
Last Payment/Date of Last Payment: The “Last Payment“ field shows the amount of the last customer ledger entry of the “Payment” type which exists on the posting date shown in the “Date of Last Payment” field. In case several customer ledger entries of the “Payment“ type exist on this posting date; the payment amounts will be summed up and shown as a total value in the “Last Payment” field.
Payment Term: This field shows the payment term code.
Payment Method: This field shows the payment method code.
Open: This field shows the total value of open entries for the selected customer.
Due: This field shows the total value of due entries for the selected customer on the specified work date.
Open Association: If the customer belongs to an association, this field shows the total of open entries of the entire customer association. Additionally, the association number is shown on the left-hand side under the customer number. This field is only available if the OPplus Associations module is licensed.
Due Association: If the customer belongs to an association, this field shows the total value of due entries of the entire customer association.
By using the buttons under Process, it is possible to browse back and forward between the customers which have open entries.

Browsing in the Open Customer Entries window is also possible by clicking the ALT key in combination with the following arrow keys:
- ALT + ← Goes back to a previous customer with open entries
- ALT + → Goes forward to the next customer with open entries
- ALT + ↑ Goes to the first customer with open entries
- ALT + ↓ Goes to the last customer with open entries
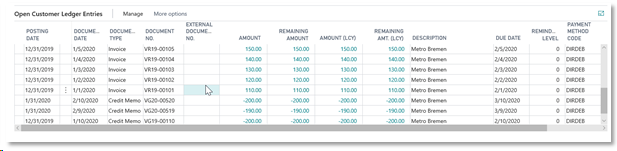
Open Customer Entries: Here the customer’s open entries are shown. The menu items “Manage“, “Entry“ and “Functions“ offer further processing possibilities.
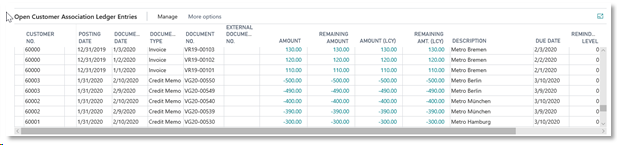
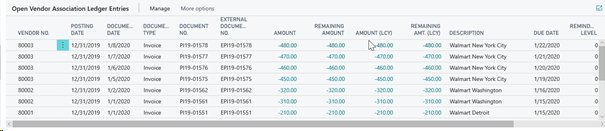
Open Customer Entries Association: Here all the open entries of the respective customer association are shown.
Open Vendor Entries: Here all open entries of associated vendors are shown.
The views “Open Customer Association Ledger Entries“ and “Open Vendor Entries“ are only available if the OPplus Associations module is licensed. The menu items “Manage“, “Entry“ and “Functions“ offer further processing possibilities.
Open Customer Entries
By selecting Views and Lists → Open Customer Entries → Report → Customer – Open Entries the open customer entries can be printed or exported to Excel:
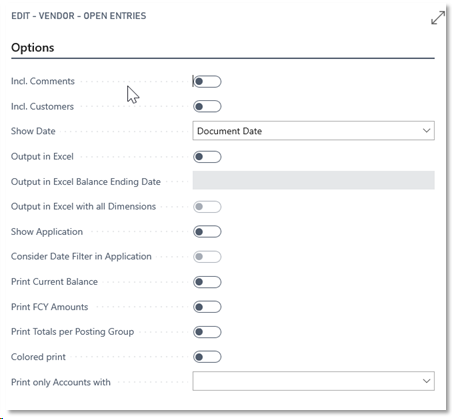
Options Tab:
| Option | Description |
|---|---|
| Incl. Comments | If this field is check marked, entry comments will be printed. |
| Incl. Vendors | If this field is check marked, vendor ledger entries will be printed. This option is only available, if the OPplus Associations module is licensed. |
| Incl. Reminder | If this field is check marked, the system will print a subtotal for each customer/reminder level. |
| Show Date | In this field the options are to show the entries with the posting date or with the document date. |
| Output in Excel | If this field is check marked, the data will be transferred to an Excel sheet. If the data should be exported to Excel without printing, at least the preview functionality for the report has to be used. |
| Output in Excel Balance Ending Date | In this field a date value can be entered to export balance ending date totals to Excel. |
| In this example an invoice dated 01/01/2020 of € 5.000 has been posted. On 01/02/2020 a partial payment of € 1.000 has been posted. Another partial payment of € 1.000 on 10/02/2020 and the remaining amount of € 3.000 on 01/03/2020. The invoice is now closed. | |
| Output in Excel with all Dimensions | Using the option “Output in Excel with all Dimensions” will show the dimensions in the Excel export respectively: |
| Show Application | If this field is check marked, not only the entry will be shown but also the related application which will appear below the entry. |
| Consider Date Filter in Application | If this field is check marked, a set date filter will be applied to the application entries. |
| Print Current Balance | If this field is check marked, the system will print the current balance in addition to the sum on a specific cutoff date. |
| Print FCY Amounts | If this field is check marked, the system will print a total per currency at the end of the report. |
| Print Totals per Posting Group | If this field is check marked, the system will print a total per posting group at the end of the report. |
| Colored Print | If this field is check marked, the “Amount (LCY)“ and “Remaining Amt. (LCY)“ fields will be shown in blue if they deviate from another. |
| Print only Accounts with | In this field the options are to display all open customer ledger entries or only customers which have a balance of “below or above 0”. |
Customer Tab:
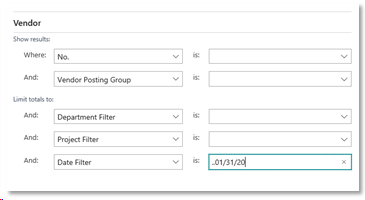
On this tab can be filtered which customers to consider in the report. In addition, a date filter must be specified.
If the report is opened with a To Date filter, the Open Entries List will be printed based on an effective date (e. g. date filter ..310120 => all open entries due as of 31/01/2020).
Cust. Ledger Entry Tab:
On this tab can be filtered which customers ledger entries to consider in the report.
Vendor Ledger Entry Tab:
On this tab can be filtered which vendor ledger entries to consider in the report. This tab is only available if the OPplus Associations module is licensed.
Ext. Cust. Detail Trial Balance
Via Views and Lists → Ext. Customer → Reports → Ext. Cust. Detail Trial Bal. the report can be printed and/or exported to Excel:
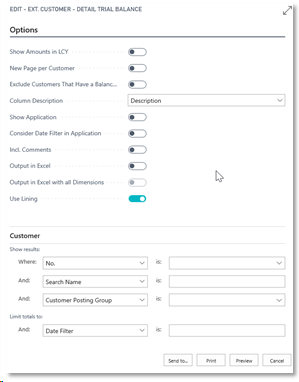
| Option | Description |
|---|---|
| Show Amount in LCY | If this field is check marked, amounts will be shown in local currency. |
| New Page per Customer | If this field is check marked, every customer will be printed on a new page. |
| Exclude Customers That Have a Balance only | If this field is check marked, the report will not contain customers without postings in the selected period. |
| Column Description | The options are “Description” (the content of the description field will be printed or “Bal. Account” (the content of the Balance Account field will be printed. |
| Show Application | If this field is check marked, the report will show the entries and in addition the related applications. The application will be shown below the entry. |
| Consider Date Filter in Application | If this field is check marked, a set date filter will be applied for the application entries as well. Works only in combination with the check marked “Show Application” field. |
| Incl. Comments | If this field is check marked, the entry comments will be printed as well. |
| Output in Excel | If this field is check marked, the data will be transferred to an Excel sheet. If the data should be exported to Excel without printing, at least the preview functionality for the report has to be used. |
| Output in Excel with all Dimensions | If this field is check marked, the entries will be exported to Excel with all Dimensions. The option is only available if the “Output in Excel“ field is activated. |
| Use Lining | If this field is check marked, every second line of the “Ext. Customer Trial Balance“ report will be highlighted in grey. |
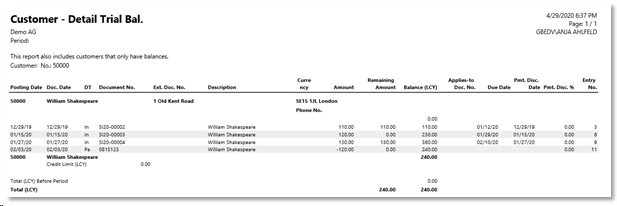
Compared to the standard report this report contains additional information for each entry. Therefore the standard paper-size is set to DIN A4 landscape format.
Preview example:
Cust. Balance Acknowledgement
This module contains a number of reports for customer balance acknowledgements.
For each report three parts can be printed: address letter, reply letter and statement of account.
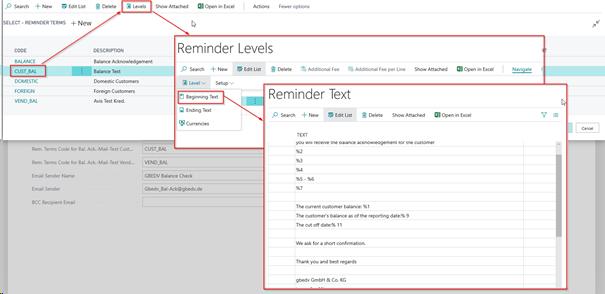
The parts address letter and reply letter are divided in three parts: beginning text, balance and ending text.
The beginning and endings texts are specified using the reminder texts. The reminder code corresponds to the customer balance acknowledgement code from the OPplus customer card.
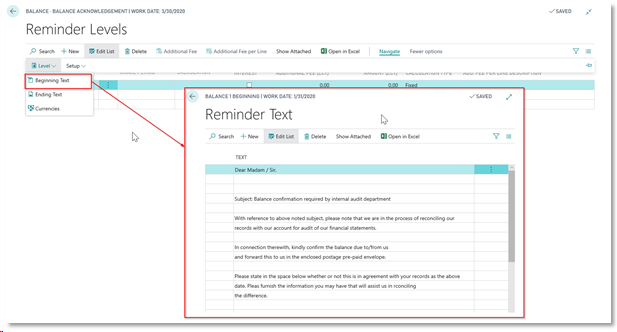
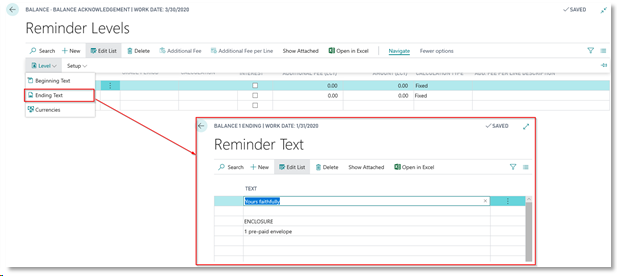
An unlimited number of codes can be set up. The system will ALWAYS use reminder level 1 for the address letter. In case a reminder level 2 is used, it will not be considered in the address letter of the customer balance acknowledgement.
Reminder level 2 can be used to enter texts for the reply letter. For replies only reminder level 2 is used. Other reminder levels will not be considered.
The report “Cust. Balance Acknowledgement” is found via Views and Lists → Ext. Customer → Reports → Cust. Balance Acknowledgement.
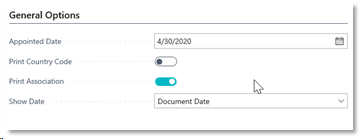
General Options Tab:
| Option | Description |
|---|---|
| Appointed Date | In this field the cutoff date for the balance acknowledgement can be entered. |
| Print Country Code | If this field is check marked, the recipient’s country code will be printed in front of the recipient’s city. |
| Print Association | If the Associations module is licensed, the field can be check marked to show the complete entry list for the entire association. Important: There is only the possibility to print associations. Customer/vendor links cannot be printed. |
| Show Date | In this field it can be selected to show either the Document Date or the Posting Date for the entry list. |
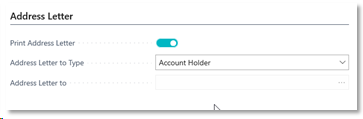
Address Letter Tab:
| Option | Description |
|---|---|
| Print Address Letter | If this field is check marked, the address letter will be printed. |
| Address Letter to Type | In this field there are three options: Option 1 as default is “Account Holder”. Option 2 is “Vendor (FA). Here a vendor (financial auditor) has to be selected in the “Address Letter to“ field. Option 3 is “Contact”. Here a contact has to be selected in the “Address Letter to” field. |
| Address Letter to | If option 1 (account holder) is selected in the “Address Letter to Type” field, no selection has to be made in this field. If option 2 (vendor) has been selected in the “Address Letter to Type” field, then a vendor has to be selected in this field. If option 3 (contact) has been selected in the “Address Letter to Type” field, then a contact has to be selected in this field |
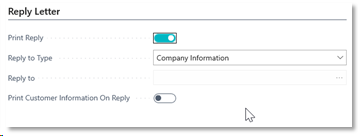
Reply Letter Tab:
| Option | Description |
|---|---|
| Print Reply | If this field is check marked, the reply letter will be printed. |
| Reply to Type | In this field there are three options: Option 1 as default is “Company Information”. Option 2 is “Vendor (FA). Here a vendor (financial auditor) has to be selected in the “Reply to“ field. Option 3 is “Contact”. Here a contact has to be selected in the “Reply to” field. |
| Reply to | Here a vendor or a contact can be selected depending on the selected option in the “Reply to Type” field. |
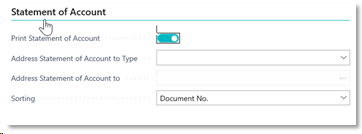
Statement of Account Tab:
| Option | Description |
|---|---|
| Print Statement of Account | If this field is check marked, the statement of account will be printed. |
| Alt. Address Statement of Account to Type | There are 4 options. Option 1 as default is “empty“ and will be managed via the address letter setup. Option 2 is “Vendor (FA)”. Here a vendor (financial auditor) has to be selected in the “Alt. Address Statement of Account to” field. Option 3 is “Contact”. Here a contact has to be selected in the “Alt. Address Statement of Account to” field. Option 4 is “Account Holder”. Here nothing has to be selected in the “Alt. Address Statement of Account to” field. |
| Alt. Address Statement of Account to | This field states which address will be printed on the statement of account. The options are Account Holder, Vendor (FA) or Contact. |
| Sorting | This field indicates by which criterion the list will be sorted. The options are: Document Number, Posting Date or Document Date. |
Customer Tab:
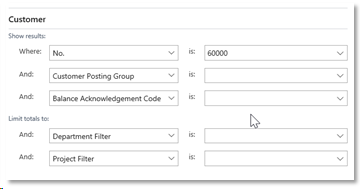
On this tab can be filtered which customers are to be considered in the customer balance acknowledgement.
Example Address Letter Balance Acknowledgement with “Account Holder” option selected in “Address Statement of Account to Type” field.
The first page contains the address data of the account holder (customer 50000) as well as the beginning texts, one line with the total balance and the ending texts.
If the customer has entries in different currencies, the printout will include a total line for each currency.
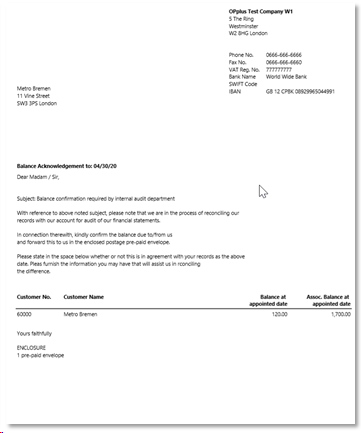
Example Reply Letter with “Company Information“ option selected in “Reply to Type“ field.
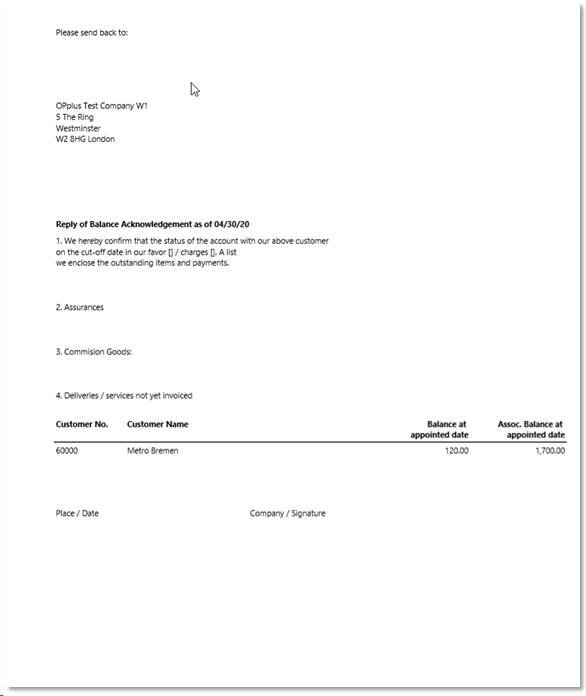
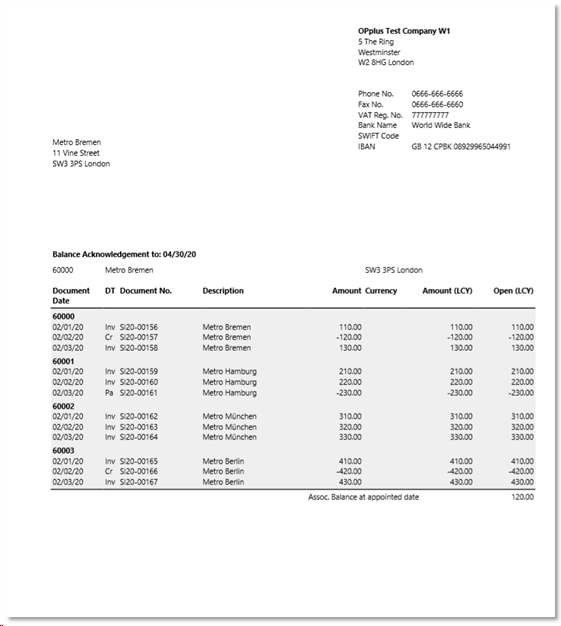
Example Statement of Account with no different address in the ”Address Statement of Account to Type” field. The report contains a list of all open entries (at the cutoff date) incl. the total balance.
Vendors
By selecting “Views and Lists” → “Ext. Vendors” the page “Ext. Vendors“ can be opened.
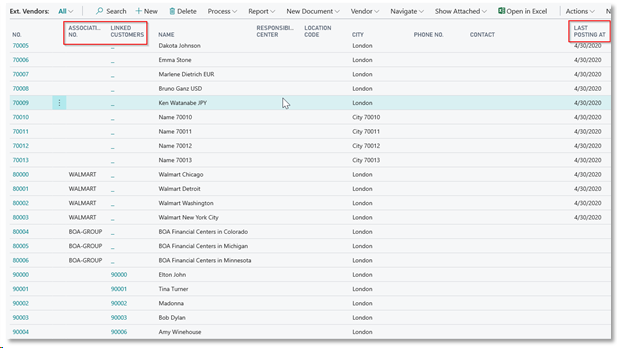
This page is based on the standard application enhanced by the columns “Association No.“ and “Linked Customers“. The corresponding information will be shown if the OPplus Association module is licensed and activated.
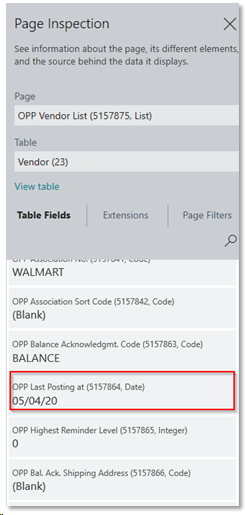
The “Last Posting at“ field is also integrated in the vendors. It will be updated provided there has been a posting for a vendor which generates entries. There is the possibility to filter directly on vendors which e. g. have been active in the last year.
By selecting Vendors → Entries the “Ext. Vendor Ledger Entries“ window can be opened which will be filtered on the selected vendor.
Ext. Vendor Ledger Entries
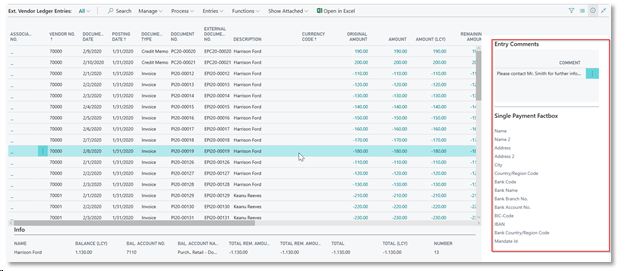
If the window is opened via Views and Lists → Ext. Vendor Ledger Entries, an unfiltered view of all vendor ledger entries will be shown.

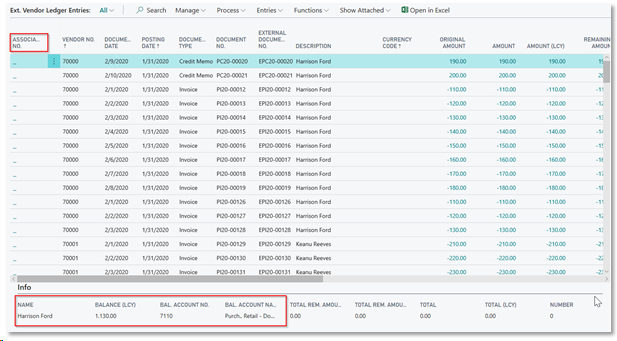
In addition to the field “Association No.” the following fields are available in the footer:
| Option | Description |
|---|---|
| Name | This field shows the vendor's name for the selected record. |
| Balance (LCY) | This field shows the vendor's balance for the selected record in local currency. |
| Bal. Account No. | This field shows the number of the related balancing account for the selected record. |
| Bal. Account Name | This field shows the name of the related balancing account for the selected record. |
The Bal. Account No. and Bal. Account Name fields are only available if the Show Bal. Account option is activated in the Extended Lists and Reports Setup.
More useful functions are to be found under the menu item “Process“.
Navigate: Clicking this menu item will activate the Business Central functionality “Navigate”.
Ledger Entry Comments: Under this menu item Ledger Entry Comments for the selected customer will be shown.
Show Posted Document: This menu item will let the system look for a sales document based on the document number. If the document is found it will be displayed immediately on the screen.
Calculate Sum: By clicking this menu item the total of the selected entries will be calculated and shown in the Total field.

On the right-hand side of the display there is a fact box showing any existing entry comments as well as a Single Payment Fact box visible if the Payments module is licensed.
Vendor Ledger Entry Comments
With the Extended Lists and Reports module it is possible to modify the contents of certain fields as well as to add additional comments for each ledger entry.
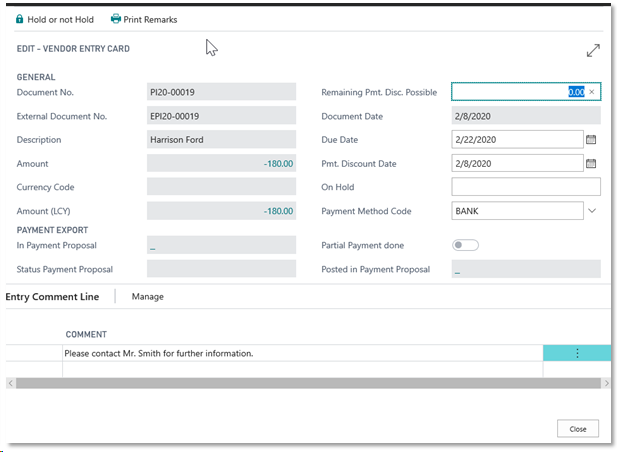
Ledger Entry Comments can be found under Views and Lists → Ext. Vendor Ledger Entries → Process → Ledger Entry Comments:
| Option | Description |
|---|---|
| Doc. No. | This field shows the entry’s document number. The content of this field cannot be modified. |
| External Doc. No. | This field shows the entry’s external document number. The content of this field can be modified depending on the setup of the Extended Lists and Reports Setup as long as the entry is open. The external document number will only be changed in the related vendor ledger entry! |
| Amount | This field shows the entry’s amount in original currency. The content of this field cannot be modified. |
| Currency Code | This field shows the currency code of the related entry. The content of this field cannot be modified. |
| Amount (LCY) | This field shows the entry’s amount in local currency. The content of this field cannot be modified. |
| Remaining Pmt. Disc. Possible | This field shows the entry’s possible remaining payment discount. The content of this field can be modified as long as the entry is open. |
| Description | This field shows the entry’s description. The content of this field can be modified depending on the setup of the Extended Lists and Reports Setup. |
| Document Date | This field shows the entry’s document date. The content of this field cannot be modified. |
| Due Date | This field shows the entry’s due date. The content of this field can be modified as long as the entry is open. |
| Pmt. Discount Date | This field shows the entry’s payment discount date.The content of this field can be modified as long as the entry is open. |
| Direct Debit Date | This field shows the calculated direct debit date. |
| In Payment Proposal | If the entry is part of a payment proposal the corresponding payment proposal number will be shown in this field. By clicking this field the respective payment proposal will open. |
| Mandate ID | This field shows the mandate ID to be used with a direct debit. |
| Status Payment Proposal | This field shows the status of the payment proposal if the entry is currently used in a payment proposal. |
| Partial Payment done | This field contains a check mark if the entry has already been posted in a payment proposal with a remaining amount unequal to zero. |
| Posted in Payment Proposal | If the entry is currently part of a posted payment proposal, the corresponding payment proposal number will be shown in this field. By clicking this field, the posted payment proposal will be opened. If the entry has already been posted in several payment proposals, a corresponding list of filtered posted payment proposals will be shown in this field. |
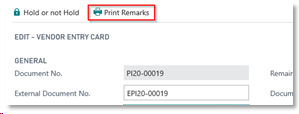
By selecting “Print Remarks“ the entry comments can be printed:
The Ledger Entry Comments report will open with a filter on the selected vendor ledger entry:
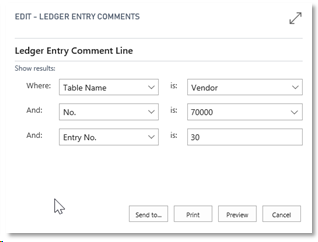
Preview Example:
Open Vendor Ledger Entries
The Extended Lists and Reports module offers an optimized display of open entries.
The extended vendor ledger entries are shown in a page consisting of information in the header and the display of the open entries in the subpage.

Open Vendor Ledger Entries -Header: The following fields among others are shown in the header:
Last Payment/Date of Last Payment: The “Last Payment“ field shows the amount of the last vendor ledger entry of the “Payment” type which exists on the posting date shown in the “Date of Last Payment” field. In case several vendor ledger entries of the “Payment“ type exist on this posting date; the payment amounts will be summed up and shown as a total value in the “Last Payment” field.
Payment Term: This field shows the payment term code.
Payment Method: This field shows the payment method code.
Open: This field shows the total value of open entries for the selected vendor.
Due: This field shows the total value of due entries for the selected vendor on the specified work date.
Open Association: If the vendor belongs to an association, this field shows the total of open entries of the entire vendor association. Additionally, the association number is shown on the left-hand side under the vendor number. This field is only available if the OPplus Associations module is licensed.
Due Association: If the vendor belongs to an association, this field shows the total value of due entries of the entire vendor association.
By using the buttons under Process, it is possible to browse back and forward between the vendors which have open entries.
Browsing in the Open vendor Entries window is also possible by clicking the ALT key in combination with the following arrow keys:
- ALT + ← Goes back to a previous vendor with open entries
- ALT + → Goes forward to the next vendor with open entries
- ALT + ↑ Goes to the first vendor with open entries
- ALT + ↓ Goes to the last vendor with open entries
Open Vendor Entries: Here the vendor’s open entries are shown. The menu items “Manage“, “Entry“ and “Functions“ offer further processing possibilities.

Open Vendor Association Ledger Entries: Any open entries of the related vendor association will be shown.
Open Customer Ledger Entries: Here all open entries of associated customers are shown.
The views ”Open Vendor Association Ledger Entries“ and ”Open Customer Ledger Entries“ are only available if the OPplus Associations module is licensed.
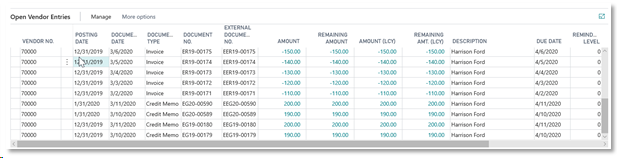
Open Vendor Entries
By selecting Views and Lists → Open Vendor Entries → Report → Vendor – Open Entries the open vendor entries can be printed or exported to Excel:
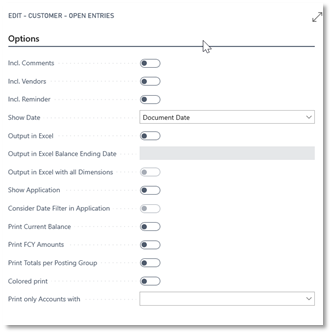
Options Tab:
| Option | Description |
|---|---|
| Incl. Comments | If this field is check marked, entry comments will be printed. |
| Incl. Vendors | If this field is check marked, vendor ledger entries will be printed. This option is only available, if the OPplus Associations module is licensed. |
| Incl. Reminder | If this field is check marked, the system will print a subtotal for each customer/reminder level. |
| Show Date | In this field the options are to show the entries with the posting date or with the document date. |
| Output in Excel | If this field is check marked, the data will be transferred to an Excel sheet. If the data should be exported to Excel without printing, at least the preview functionality for the report has to be used. |
| Output in Excel Balance Ending Date | In this field a date value can be entered to export balance ending date totals to Excel. |
| In this example an invoice dated 01/01/2020 of € 5.000 has been posted. On 01/02/2020 a partial payment of € 1.000 has been posted. Another partial payment of € 1.000 on 10/02/2020 and the remaining amount of € 3.000 on 01/03/2020. The invoice is now closed. | |
| Output in Excel with all Dimensions | Using the option “Output in Excel with all Dimensions” will show the dimensions in the Excel export respectively: |
| Show Application | If this field is check marked, not only the entry will be shown but also the related application which will appear below the entry. |
| Consider Date Filter in Application | If this field is check marked, a set date filter will be applied to the application entries. |
| Print Current Balance | If this field is check marked, the system will print the current balance in addition to the sum on a specific cutoff date. |
| Print FCY Amounts | If this field is check marked, the system will print a total per currency at the end of the report. |
| Print Totals per Posting Group | If this field is check marked, the system will print a total per posting group at the end of the report. |
| Colored Print | If this field is check marked, the “Amount (LCY)“ and “Remaining Amt. (LCY)“ fields will be shown in blue if they deviate from another. |
| Print only Accounts with | In this field the options are to display all open customer ledger entries or only customers which have a balance of “below or above 0”. |
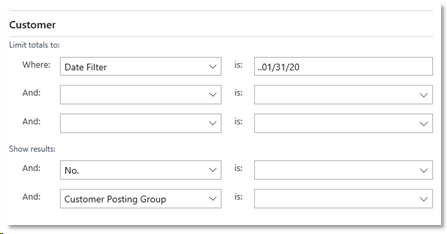
Vendor Tab:
On this tab can be filtered which vendor to consider in the report. In addition, a date filter must be specified.
If the report is opened with a To Date filter, the Open Entries List will be printed based on an effective date (e. g. date filter ..310120 => all open entries due as of 31/01/2020).
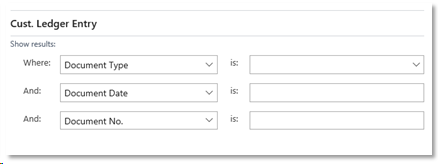
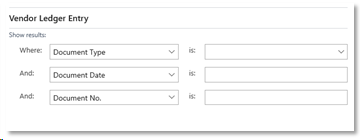
Vendor Ledger Entry Tab:
On this tab can be filtered which vendor ledger entries to consider in the report.
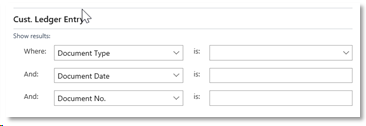
Customer Ledger Entry Tab:
On this tab can be filtered which customer ledger entries to consider in the report. This tab is only available if the OPplus Associations module is licensed.
Ext. Vend. Detail Trial Balance
Via Views and Lists → Ext. Vendor → Reports → Ext. Vend. Detail Trial Bal. the report can be printed and/or exported to Excel:
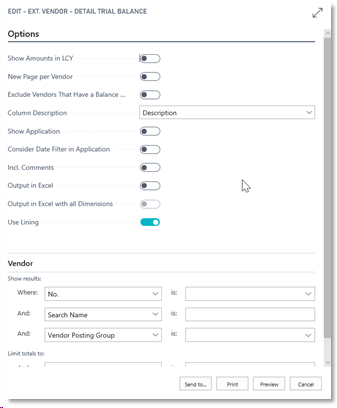
| Option | Description |
|---|---|
| Show Amount in LCY | If this field is check marked, amounts will be shown in local currency. |
| New Page per Vendor | If this field is check marked, every Vendor will be printed on a new page. |
| Exclude Vendors That Have a Balance only | If this field is check marked, the report will not contain Vendors without postings in the selected period. |
| Column Description | The options are “Description” (the content of the description field will be printed or “Bal. Account” (the content of the Balance Account field will be printed. |
| Show Application | If this field is check marked, the report will show the entries and in addition the related applications. The application will be shown below the entry. |
| Consider Date Filter in Application | If this field is check marked, a set date filter will be applied for the application entries as well. Works only in combination with the check marked “Show Application” field. |
| Incl. Comments | If this field is check marked, the entry comments will be printed as well. |
| Output in Excel | If this field is check marked, the data will be transferred to an Excel sheet. If the data should be exported to Excel without printing, at least the preview functionality for the report has to be used. |
| Output in Excel with all Dimensions | If this field is check marked, the entries will be exported to Excel with all Dimensions. The option is only available if the “Output in Excel“ field is activated. |
| Use Lining | If this field is check marked, every second line of the “Ext. Vendor Trial Balance“ report will be highlighted in grey. |
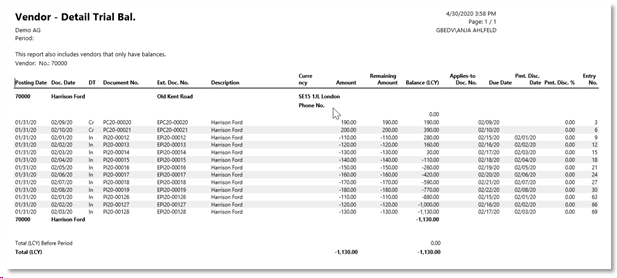
Compared to the standard report this report contains additional information for each entry. Therefore the standard paper-size is set to DIN A4 landscape format.
Preview example:
Vend. Balance Acknowledgement
This module contains a number of reports for vendor balance acknowledgements.
For each report three parts can be printed: address letter, reply letter and statement of account.
The parts address letter and reply letter are divided in three parts: beginning text, balance and ending text.
The beginning and endings texts are specified using the reminder texts. The reminder code corresponds to the vendor balance acknowledgement code from the OPplus vendor card.
An unlimited number of codes can be set up. The system will ALWAYS use reminder level 1 for the address letter. In case a reminder level 2 is used, it will not be considered in the address letter of the vendor balance acknowledgement.
Reminder level 2 can be used to enter texts for the reply letter. For replies only reminder level 2 is used. Other reminder levels will not be considered.
The report “Vend. Balance Acknowledgement” is found via Views and Lists → Ext. vendor → Reports → Vend. Balance Acknowledgement.
General Options Tab:
| Option | Description |
|---|---|
| Appointed Date | In this field the cutoff date for the balance acknowledgement can be entered. |
| Print Country Code | If this field is check marked, the recipient’s country code will be printed in front of the recipient’s city. |
| Print Association | If the Associations module is licensed, the field can be check marked to show the complete entry list for the entire association. Important: There is only the possibility to print associations. Customer/vendor links cannot be printed. |
| Show Date | In this field it can be selected to show either the Document Date or the Posting Date for the entry list. |
Address Letter Tab:
| Option | Description |
|---|---|
| Print Address Letter | If this field is check marked, the address letter will be printed. |
| Address Letter to Type | In this field there are three options: Option 1 as default is “Account Holder”. Option 2 is “Vendor (FA). Here a vendor (financial auditor) has to be selected in the “Address Letter to“ field. Option 3 is “Contact”. Here a contact has to be selected in the “Address Letter to” field. |
| Address Letter to | If option 1 (account holder) is selected in the “Address Letter to Type” field, no selection has to be made in this field. If option 2 (vendor) has been selected in the “Address Letter to Type” field, then a vendor has to be selected in this field. If option 3 (contact) has been selected in the “Address Letter to Type” field, then a contact has to be selected in this field |
Reply Letter Tab:
| Option | Description |
|---|---|
| Print Reply | If this field is check marked, the reply letter will be printed. |
| Reply to Type | In this field there are three options: Option 1 as default is “Company Information”. Option 2 is “Vendor (FA). Here a vendor (financial auditor) has to be selected in the “Reply to“ field. Option 3 is “Contact”. Here a contact has to be selected in the “Reply to” field. |
| Reply to | Here a vendor or a contact can be selected depending on the selected option in the “Reply to Type” field. |
Statement of Account Tab:
| Option | Description |
|---|---|
| Print Statement of Account | If this field is check marked, the statement of account will be printed. |
| Alt. Address Statement of Account to Type | There are 4 options. Option 1 as default is “empty“ and will be managed via the address letter setup. Option 2 is “Vendor (FA)”. Here a vendor (financial auditor) has to be selected in the “Alt. Address Statement of Account to” field. Option 3 is “Contact”. Here a contact has to be selected in the “Alt. Address Statement of Account to” field. Option 4 is “Account Holder”. Here nothing has to be selected in the “Alt. Address Statement of Account to” field. |
| Alt. Address Statement of Account to | This field states which address will be printed on the statement of account. The options are Account Holder, Vendor (FA) or Contact. |
| Sorting | This field indicates by which criterion the list will be sorted. The options are: Document Number, Posting Date or Document Date. |
Vendor Tab:
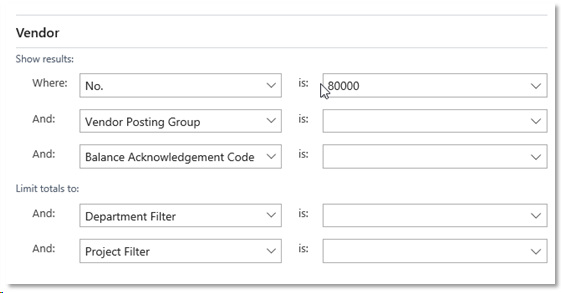
On this tab can be filtered which vendor are to be considered in the vendor balance acknowledgement.
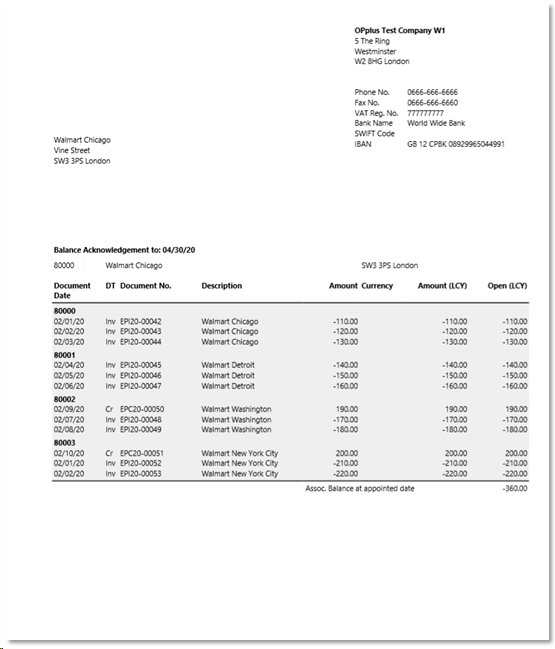
Example Address Letter Balance Acknowledgement with “Account Holder” option selected in “Address Statement of Account to Type” field.
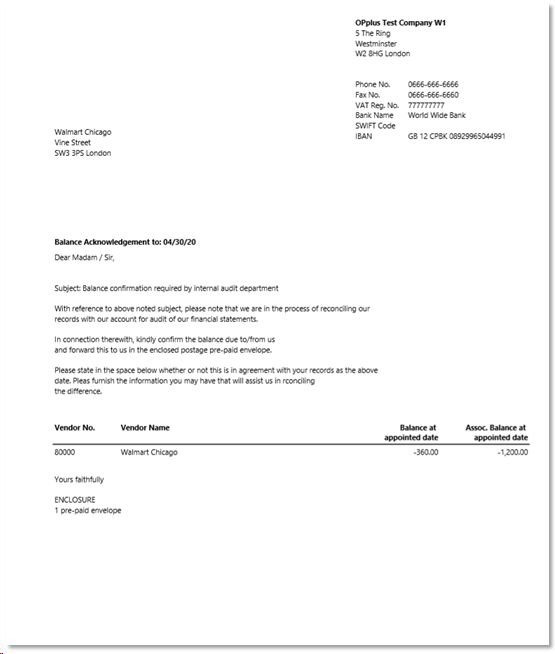
The first page contains the address data of the account holder (Vendor 80000) as well as the beginning texts, one line with the total balance and the ending texts.
If the vendor has entries in different currencies, the printout will include a total line for each currency.
Example Reply Letter with “Company Information“ option selected in “Reply to Type“ field.
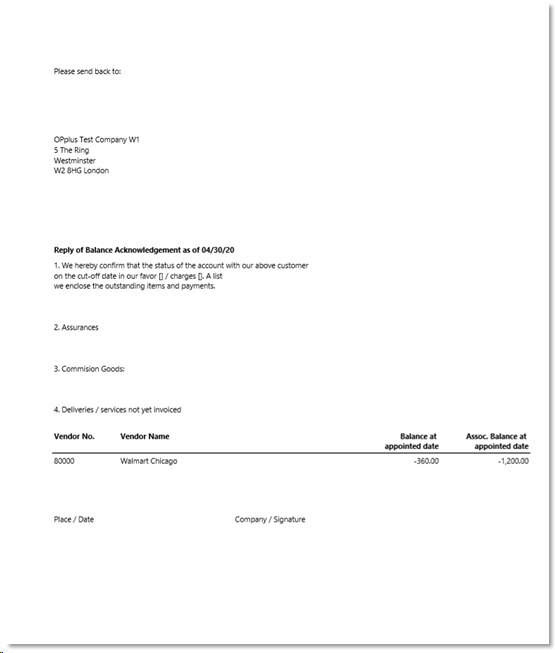
Example Statement of Account with no different address in the ”Address Statement of Account to Type” field. The report contains a list of all open entries (at the cutoff date) incl. the total balance.
Posted on Field in Customer and Vendor Ledger Entries
The “Posted on“ field which already exists in the G/L entries is now also available in the customer and vendor ledger entries.
The “Posted on” field is not visible in the entries pages but has to be inserted individually by the partners if desired.
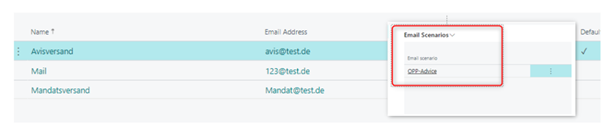
Send Balance Acknowledgement via E-Mail
This release provides the mailing of the balance acknowledgement via Email. For this the standard Business Central logic for Email sending is used. The e-mail scenarios of the standard were integrated for this purpose.
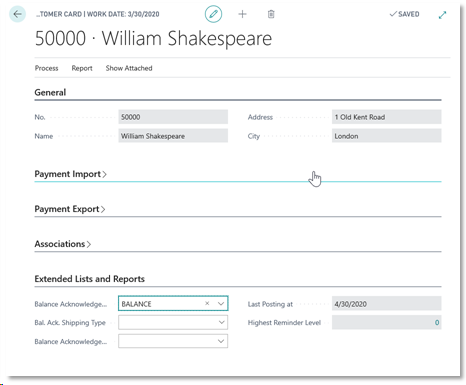
Mailing - Setup Customer/Vendor
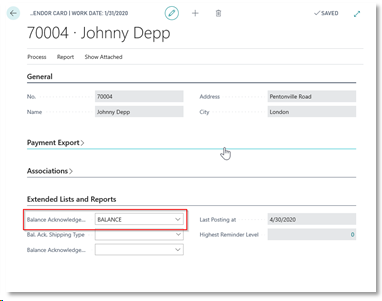
On the customer/vendor card a default can be set in the new “Bal. Ack. Shipping Type“ field.

| Option | Description |
|---|---|
| Balance Acknowledgement Shipping Type | There are the following options: Empty = equals a printout of the balance acknowledgement. Letter = equals a printout of the balance acknowledgement. E-Mail = equals a mailing of the pdf via e-mail. |
| Balance Acknowledgement Shipping Address | In this field a vendor can be selected where the balance acknowledgement will be sent to. If the field is left empty, the customer’s/vendor’s e-mail address will be used. |
Mailing - Extended Lists and Reports Setup
There are new fields in the Extended Lists and Reports Setup which are used with the Balance Acknowledgement Mailing function.
| Option | Description |
|---|---|
| Reminder Code for Balance Acknowledgement Mail-Text Customer | This field contains the reminder code for the texts to be used for the Emails to customers. If this field is empty, there will be a corresponding error message upon creating the mailing. |
| Reminder Code for Balance Acknowledgement Mail-Text Vendor | This field contains the reminder code for the texts to be used for the Emails to vendors. If this field is empty, there will be a corresponding error message upon creating the mailing. |
| Email Sender Name | This field contains the sender’s name which is to be used in the mailing. |
| Email Sender | This field contains the sender’s Email-address which is to be used in the mailing. |
| Date Formula Appointed Date Balance Acknowledgement | An appointed date is needed for the balance acknowledgement. This field contains the corresponding date formula for the calculation of the appointed date. It will be calculated on the basis of the work date. If e. g. the appointed date should be set to the last day of the prior year the date formula is “-1Y+CY-1D“. |
| Print Page 1 Bal. Ack. Shipping | If this field is check marked, the first page (address letter) of the balance acknowledgement will be printed. At least one check mark is needed. |
| Print Page 2 Bal. Ack. Shipping | If this field is check marked, the second page (entries) of the balance acknowledgement will be printed. At least one check mark is needed. |
| Print Page 3 Bal. Ack. Shipping | If this field is check marked, the third page (reply letter) of the balance acknowledgement will be printed. At least one check mark is needed. |
| Return letter to type | With this option you define to whom the return letter should be addressed. For an auditor, select Creditor (WP). |
| Return letter to | Here you can specify a vendor or contact. This field is related to the Return letter to type field. |
Mailing - Setup Texts
For the text setup the reminder codes of Dynamics Business Central are used. A new reminder code can be defined.
The reminder level has to be set to “1“. There the Email text (incl. signature) is defined as beginning text.
In case of English-speaking contact persons, reminder level 2 can be defined within the reminder code. In case the vendor/customer or corresponding contact person has a language code which is not empty or DEU, then the English text of reminder level 2 will be used (if setup is done).
With texts the following place holders can be used:
| Option | Description |
|---|---|
| %1 | Balance |
| %2 | Name |
| %3 | Address |
| %4 | Address 2 |
| %5 | Postal Code |
| %6 | City |
| %7 | Country/Region Code |
| %8 | Balance (LCY) |
| %9 | Balance at Appointed Date |
| %10 | Balance (LCY) at Appointed Date |
| %11 | Appointed Date |
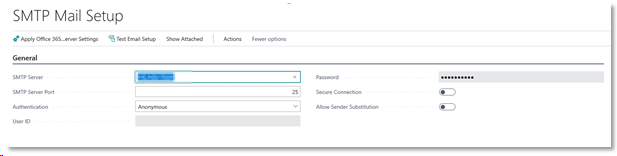
Mailing - SMTP Setup
For the automatic mailing a corresponding SMTP setup is needed which will manage the shipping.
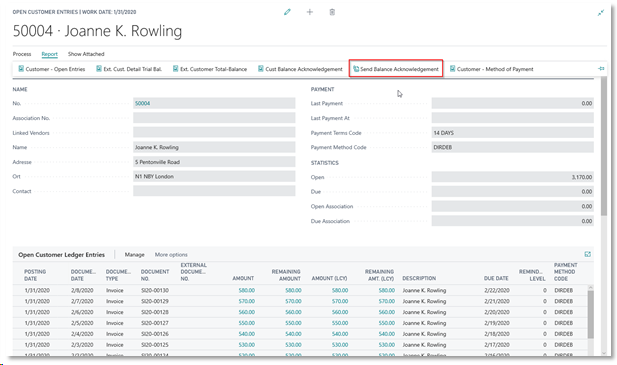
Mailing - Manual Usage
In the “Open Entries“ window the Balance Acknowledgements Shipping can be started:
As in the standard application a request window will open how to manage the document.

| Option | Description |
|---|---|
| No: No Email will be sent. Yes (Prompt for Settings): As in the standard application a default based on the setup texts will be offered which can be edited manually. Then the Email can be created and opened. Yes (Use Default Settings): the Email will be created and sent automatically based on the setup texts. | |
| Email Attachment | PDF: Creates a PDF of the printout |
| Disk | No: There is no storage in the file system. PDF: The pdf will be stored in the assigned path. |
A combination of various parts is possible e. g. to start a printout and to store the pdf in the system.
The following window shows the Email option:
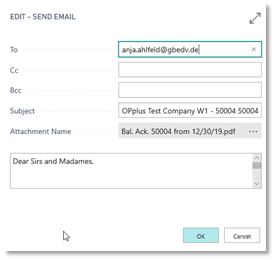
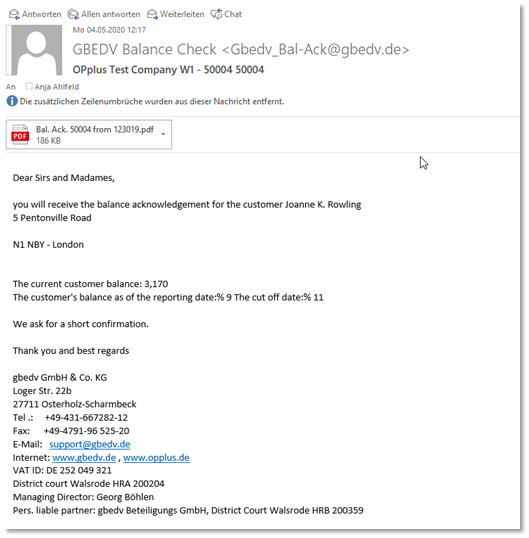
The used place holders are automatically substituted with the respective texts. Texts/recipients can be modified. By clicking OK the Email will be sent automatically via SMTP using the assigneg sender.
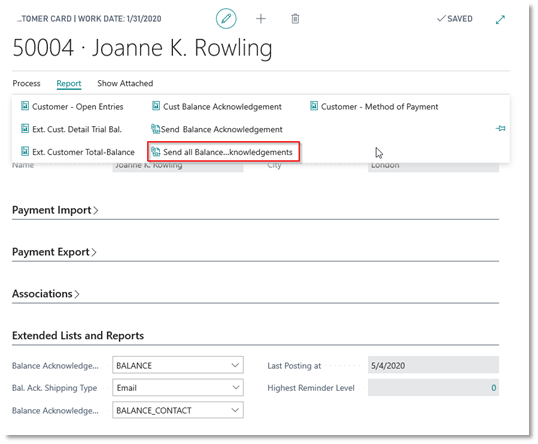
Mailing - Automatic Usage
The automatic usage can be found on the OPplus customer/vendor card. Here also a separate balance acknowledgement for the respective account can be sent.
The following window will appear:
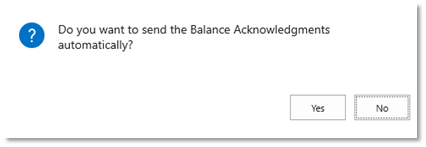
According to the setup all accounts with a respective balance will be processed.
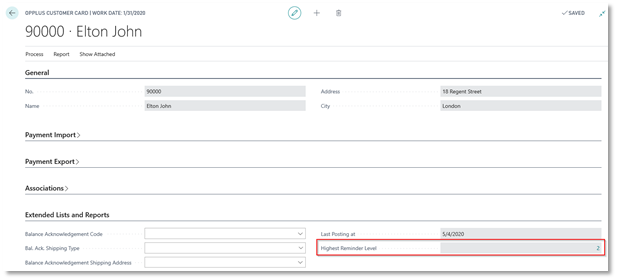
Display of Highest Reminder Level in Customers
On the OPplus customer card there is a new field “Highest Reminder Level” on the “Extended Lists and Reports” tab which checks which open entry has the highest reminder level.
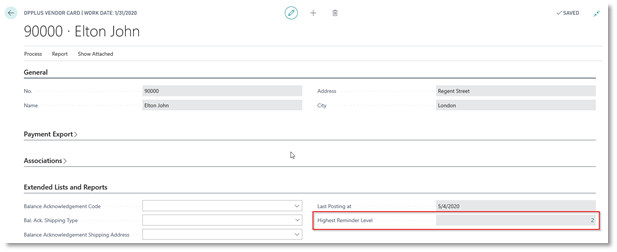
The field is also available on the “Extended Lists and Reports“ tab on the vendor card but only if the “Associations” module is licensed.
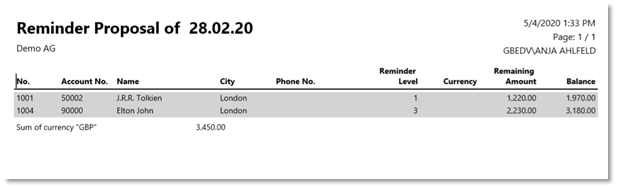
Integration of a Dunning List
A dunning list has been integrated in the dunning process.
The dunning list shows an overview of all created reminders and can, depending on the setup, be printed with or without entry data. The actual reminder level of the entry is displayed as well. The dunning list is to be found in the “Reminders“ window.

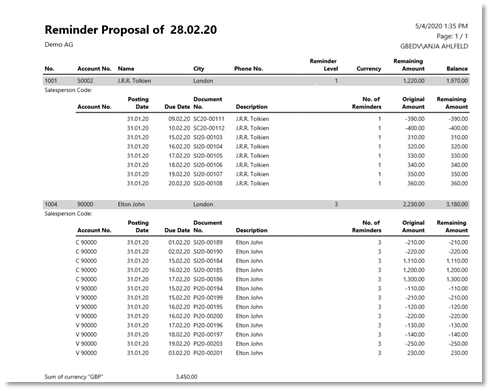
With corresponding entry data, the layout looks as follows:
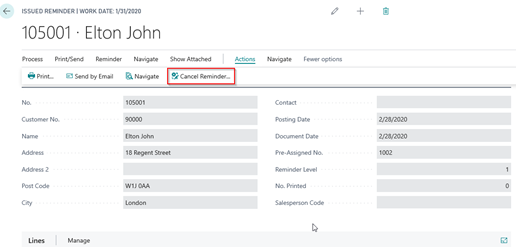
Cancel Issued Reminders
A new functionality allows to cancel issued reminders. The following values are deleted/set back accordingly:
- Entries (last issued reminder level)
- Reminder Comments
- Reminder/Fin. Charge Entries
- Reminder Header
- Reminder Lines
If additional fees are used, those will not be set back automatically.
If the additional OPplus Associations module is licensed, then vendor entries will be checked and processed as well.
The function is found on the customer card:
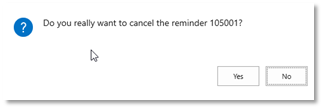
A request window appears before the issued reminder is canceled:
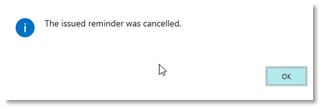
After the cancelation a confirmation window appears:
If there is an entry in the issued reminder for which already exists more up-to-date issued reminders, there will be an error message:
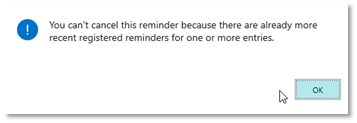
In this case the issued reminders have to be processed from the highest issued reminder level to the lowest issued reminder level.
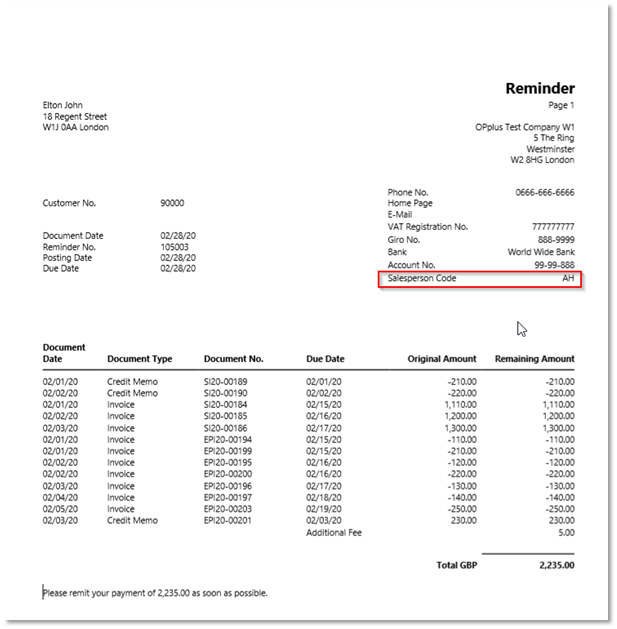
Sales Person Code in Reminder
The sales person code has been added to the reminders and can be found in the header of the reminder/issued reminder:
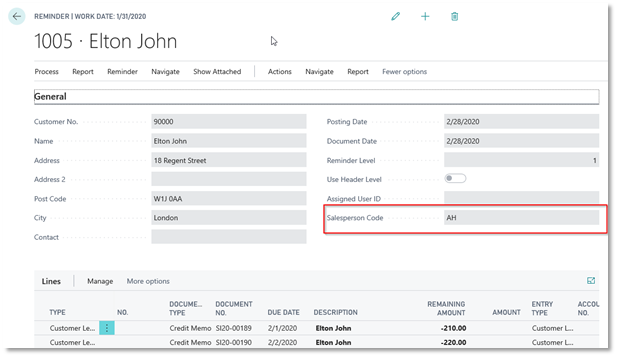
The sales person code will also be found in the print-out of the reminder.
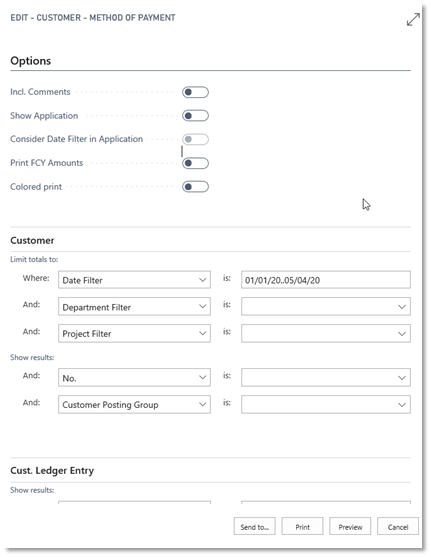
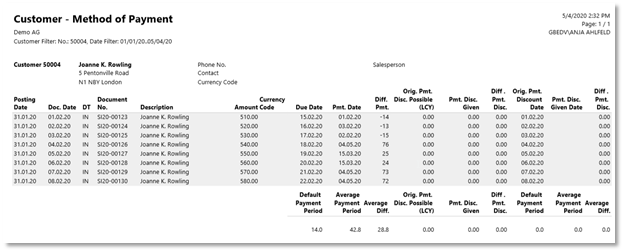
New Report Customer Method of Payment
The „Customer Method of Payment” report was available in older NAV versions (till 2009) and will now be again provided by OPplus.
Report Customer Aged Accounts Receivable
The report "Customer Aged Accounts Receivable" was created to support the end-of-year closing work and the calculation of the provision amounts at a defined reporting date. This report is defined by a column layout. In the column layout, several percentages can be specified for determining the provision, depending on the age of the receivables.
The report then calculates the allowance totals based on the specified layout. Here it is possible to grade according to the age of the receivables.
A new page has been created to define the column layout for this report.
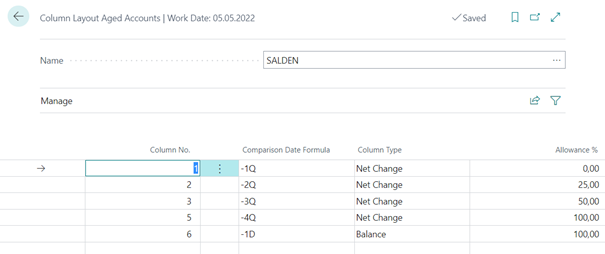
| Option | Description |
|---|---|
| Name | This specifies the name of the column layout. |
| Column No. | An ascending number is specified here. |
| Date formula | The date formula is used to calculate the period under consideration, starting from the key date of the report. |
| Column Type | In this field you can choose between "Movement" and Balance. For the individual periods under review, please select "Movement". |
| Value adjustment percentage | Enter here the percentage with which the amount of the value adjustment is to be calculated. |
Important! As the last line, a line for the balance with a percentage of 100 must be entered. This is necessary for the calculation of the report.
Report options:
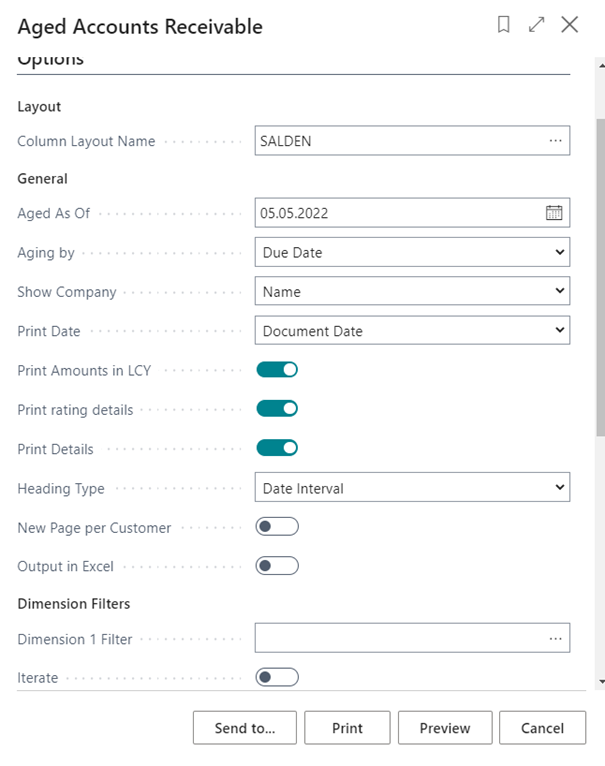
To print the individual entries and the valuation totals in the report, please set the "Print valuation details" and "Print details" options to "Yes".
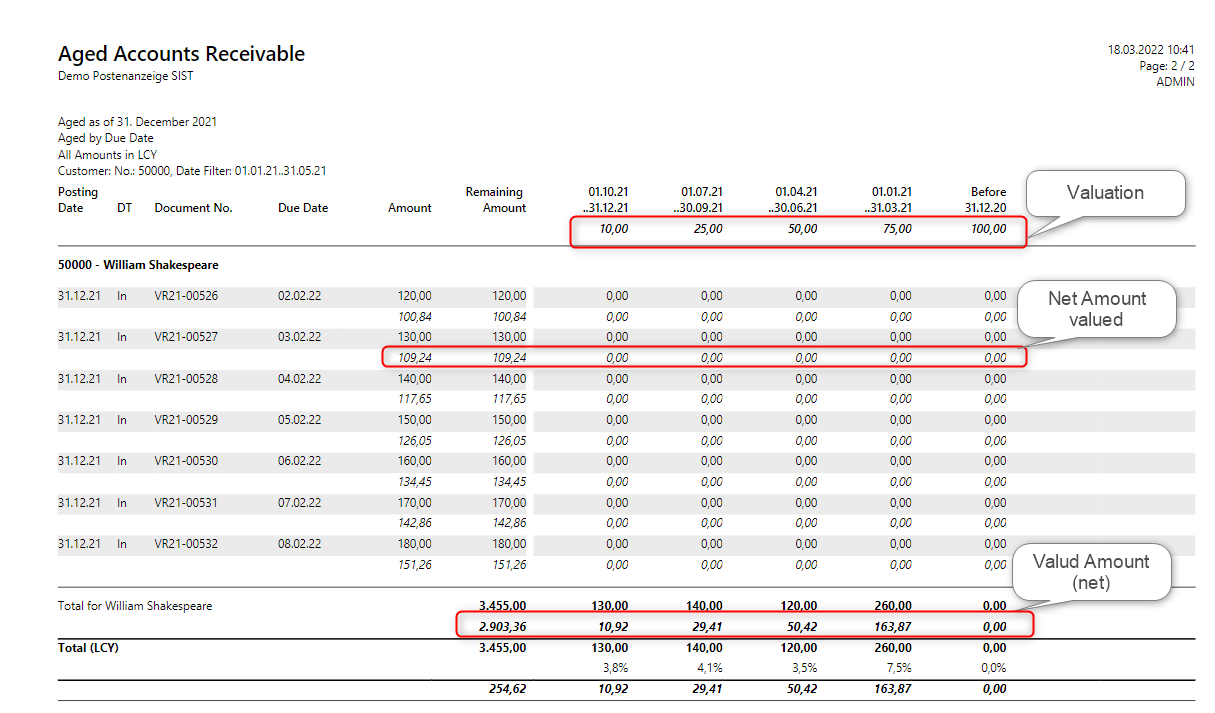
With these options the report will print the following information:
Use of Hyperlinks in Reports
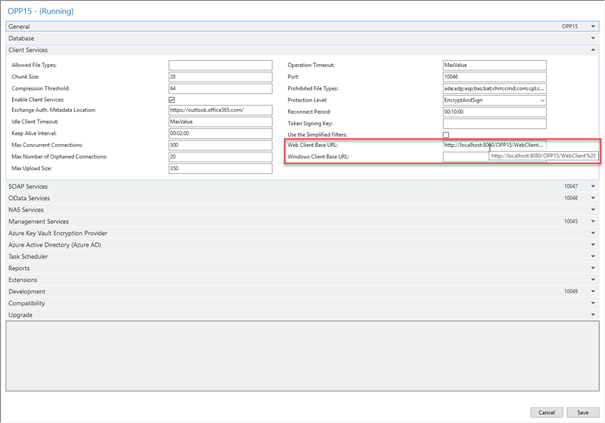
If this functionality is to be used, then the configuration file has to be modified respectively so that the internal function “GETURL” creates the correct link.
The following key has to be added (XYZ acts as a place holder):
<add key=„PublicWebBaseUrl“ value=„XYZ“/>
For further information refer to: https://blogs.msdn.microsoft.com/nav/2013/11/04/creating-urls-to-microsoft-dynamics-nav-clients/#comment-1282
This is a task for the system administrator!
Using the Extended Lists and Reports Module with the Base Module
Ledger Entry Comments
On the “Cash Receipt Journal” ledger entry comments can be entered directly upon posting.
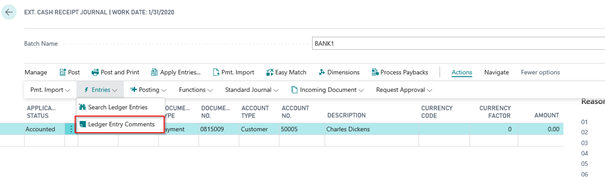
Clicking Actions → Entries → Ledger Entry Comments will open the “Comment“ window.
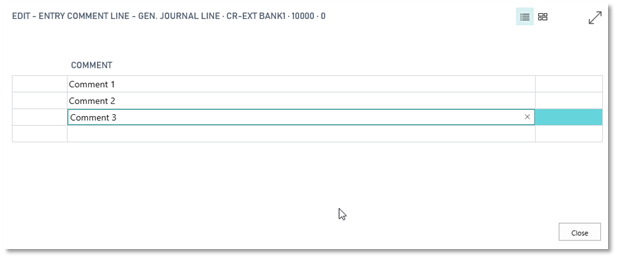
These comments will be transferred to the respective customer or vendor ledger entries and be displayed there.
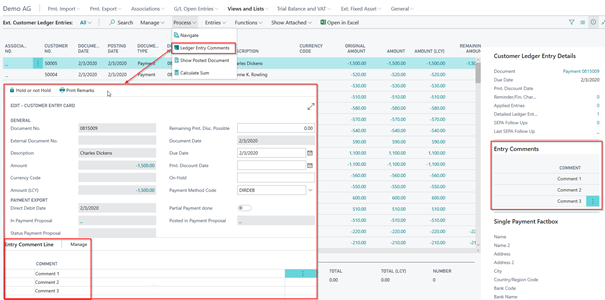
Using the Extended Lists and Reports module with the Association Module
If the Extended Lists and Reports module is used in combination with the Association module, the open entries lists are also available in the following reports:
- Association → Customer Association - Open Entries
- Association → Vendor Association – Open Entries
If the Extended Lists and Reports module and the Association module are used with the reminder of vendor ledger entries in the customer/vendor link, the last issued reminder level can be shown for the vendor ledger entries (the “Last Issued Reminder Level” field has to be inserted by using Design, if necessary):
- Extended Lists and Reports → Vendors → Vendor Ledger Entries
- Extended Lists and Reports → Vendors → Open Vendor Entries
In the following windows the relevant reminder entries for a specific vendor ledger entry can be shown by selecting “Reminder/Fin. Charge Entries“ via the „Entry“ button:
- Vendor Ledger Entries
- Ext. Ledger Entries