General
The following documentation contains a detailed description of the procedure for setting up and using the new demo data tool in OPplus, so that you can prepare and perform your own test scenarios and presentations at the customer's premises as easily as possible.
Creation of a new company in the database
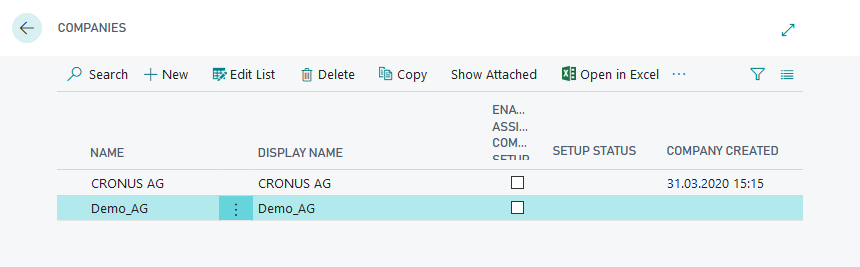
To use the "OPP Build Demodata DEMO" report described under "Objectives", which enables you to present various OPplus functionalities, a new company must be created in the database used. Please note that the term "DEMO" or "TEST" has to be used in the name of the created company. In a SaaS environment it is sufficient that the corresponding company is marked as an evaluation company. To create the new demo company, open the list of companies in the Microsoft Dynamics 365 Business Central Webclient. Via the menu item "New" you create a new line in the company list in which the name of the company needs to be assigned. After leaving the "Name" field, the company is created. Then you can assign the display name. If no display name is assigned, it will automatically be filled with the assigned company name when the report starts.
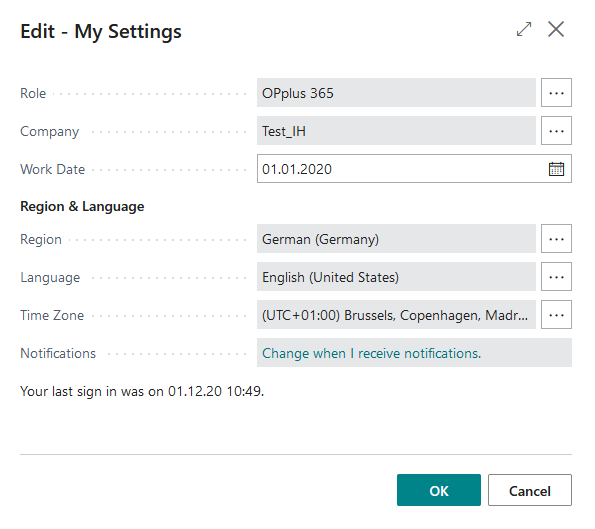
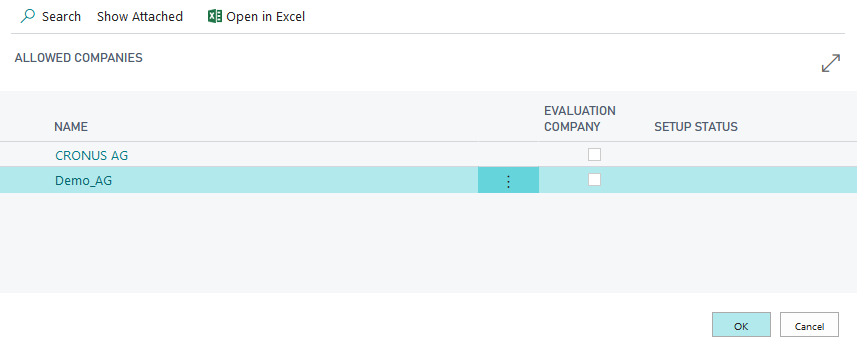
The next step is to choose the newly created company throughout the menu "My Settings".
In the newly created company you are now able to add, setup and start the report "OPP Build Demodata" in the list of Run Objects.
Start of the report OPP Build Demodata DEMO
Use the BC Search function to access the menu item "Start Object".
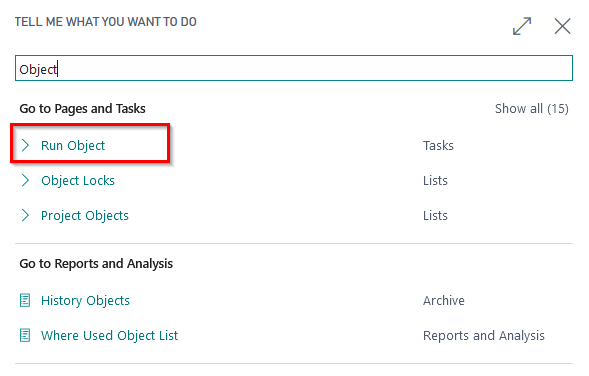
The object type "Report" with the object ID 5157991 is firstly entered and selected.
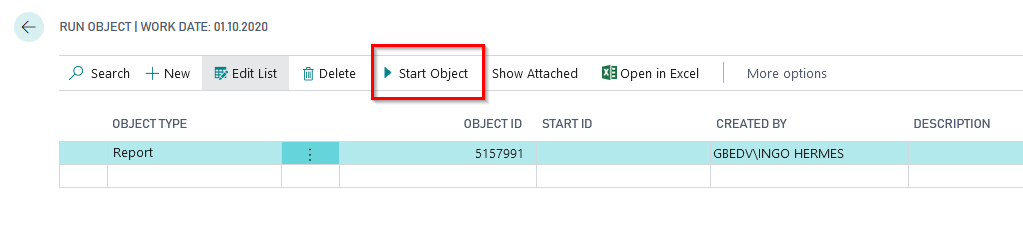
After choosing the report throughout the menu item "Start Object" you are able to run the setup and choose and run the functionalities.
In the following, the options in the setup area on the setup tab of the demo module are described.
Setup
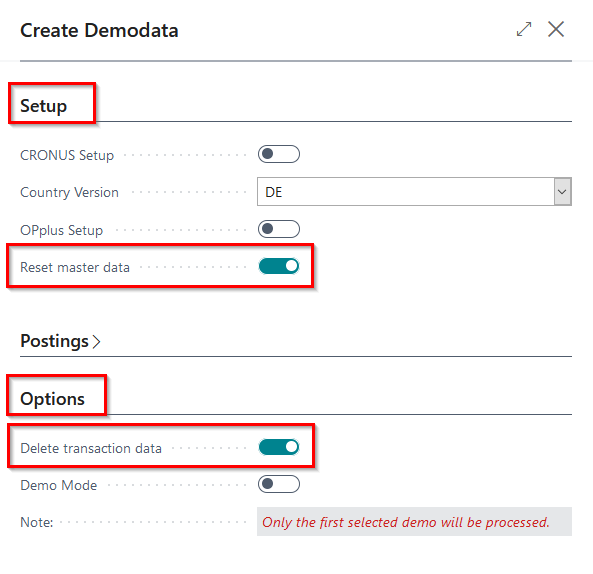
In the register "Setup" the original data reduced from the CRONUS can be set up by selecting the corresponding field "CRONUS Setup". This ensures that the setup and master data tables relevant for OPplus are already filled for the selected country version. The available country versions for the demo data are DE, W1, US, AT, CH, FR, NL, UK, ES and BE.
If the OPplus Setup table is already set up in the respective client, i.e. if a data set exists, this field is not actively preset, and if the table is not set up, this field is preset with a corresponding selection. The same applies to the CRONUS setup.
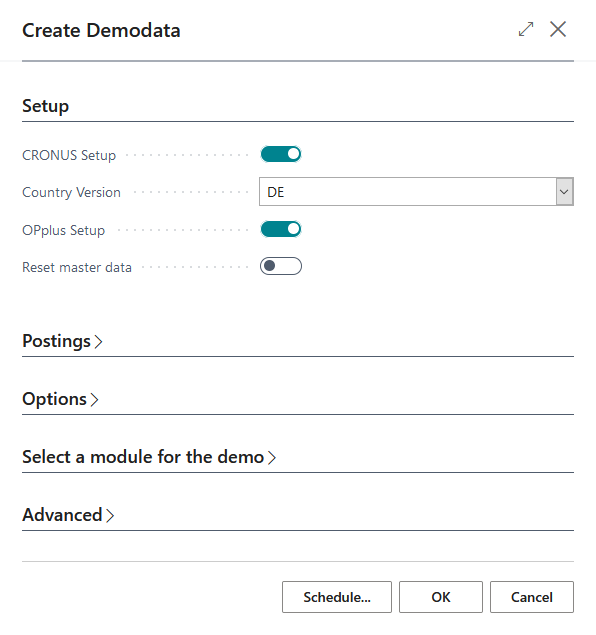
Furthermore, if the corresponding field is selected, the report adopts the OPplus setup and creates customers, vendors, bank accounts and articles in the DEMO company. The payment types relevant for future payment transactions are also created by the OPplus setup. For all OPplus modules the basic setup is still carried out. In this example, the setup for the country version DE was carried out.
After successful setup, the following message appears:
You can then view the master data generated in the DEMO company.
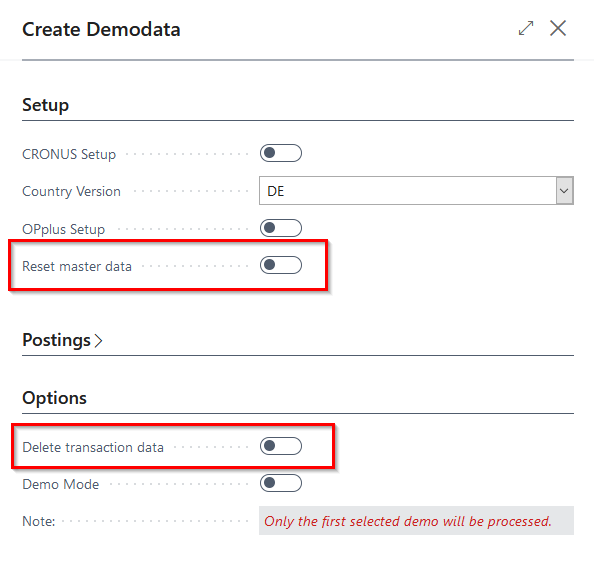
- Advice: The master and transaction data generated by the "OPP Build Demodata" can be reset or removed by restarting the report with the option "Reset master data" or "Delete transaction data".
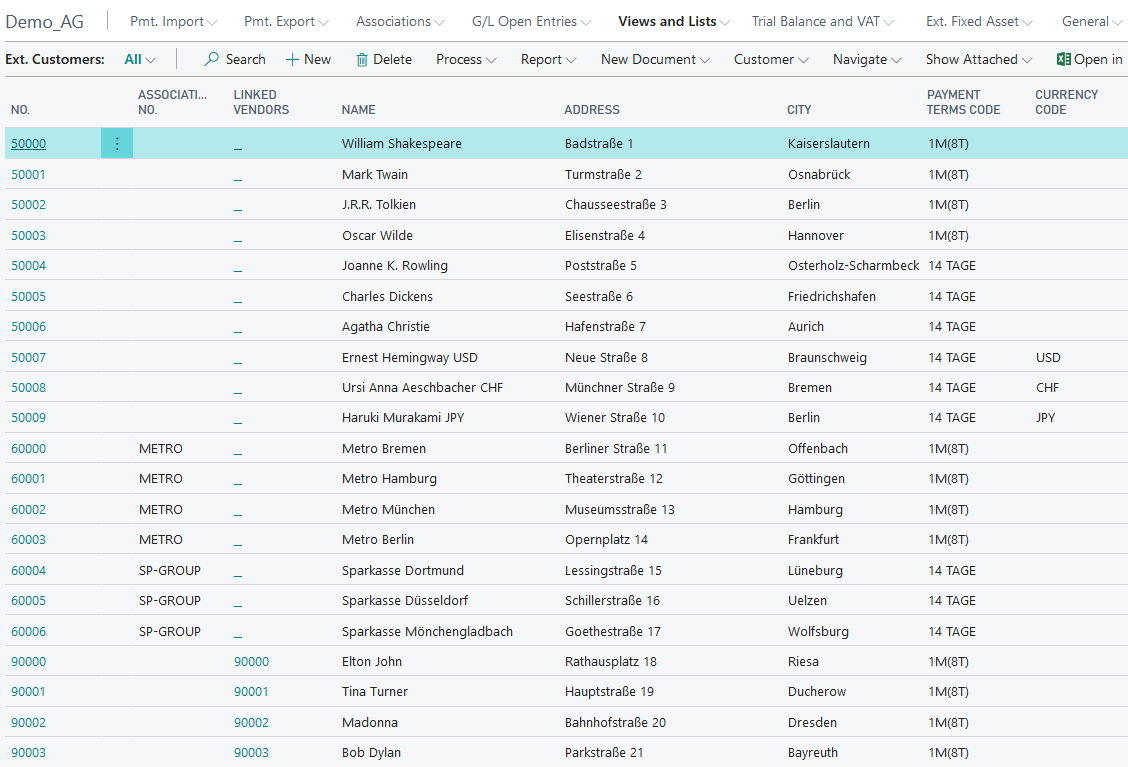
Customers and Customer Structure
Customer master data is created by executing the setup function of the Demo Data Report. The following structure has been taken into account for presentation purposes:
Customers 50000..50003
Inland Customers, Payment Terms 1M(8D), Payment Method Direct Debit
Customers 50004..50006
EU Customers, Payment Terms 14 days, Payment Method Direct Debit
Customers 50007..50009
Third Country Customers, Payment Terms 14 days, Payment Method blank, divers foreign currencies
Customers 60000..60003
Inland Customers, Payment Terms 1M(8T), Payment Method Direct Debit, Customer Association „METRO“
Customers 60004..60006
EU Customers, Payment Terms 14 days, Payment Method Direct Debit, Customer Association „SP-Group“
Customers 90000..90003
Inland Customers, Payment Terms 1M(8T), Payment Method Direct Debit, Customer-Vendor-Linking
Customers 90004..90006
EU Customers, Payment Terms 14 days, Payment Method Direct Debit, Vendor Association
Vendors and Vendor Structure
Vendor master data is created by executing the setup function of the Demo Data Report. The following structure has been taken into account for presentation purposes:
Vendors 70000..70003
Inland Vendors, Payment Terms 1M(8D), Payment Method Bank
Vendors 70004..70006
EU Vendors, Payment Terms 14 days, Payment Method Bank
Vendors 70007..70009
Third Country Vendors, Payment Terms 14 days, Payment Method Ausland, divers foreign currencies
Vendors 80000..80003
Inland Vendors, Payment Terms 1M(8T), Payment Method Bank, Vendor Association „WALMART“
Vendors 80004..80006
EU Vendors, Payment Terms 14 days, Payment Method Bank, Vendor Association „BOA-GROUP“
Vendors 90000..90003
Inland Vendors, Payment Terms 1M(8T), Payment Method Bank, Customer-Vendor-Linking
Vendors 90004..90006
EU Vendors, Payment Terms 14 days, Payment Method Bank, Customer-Vendor-Linking
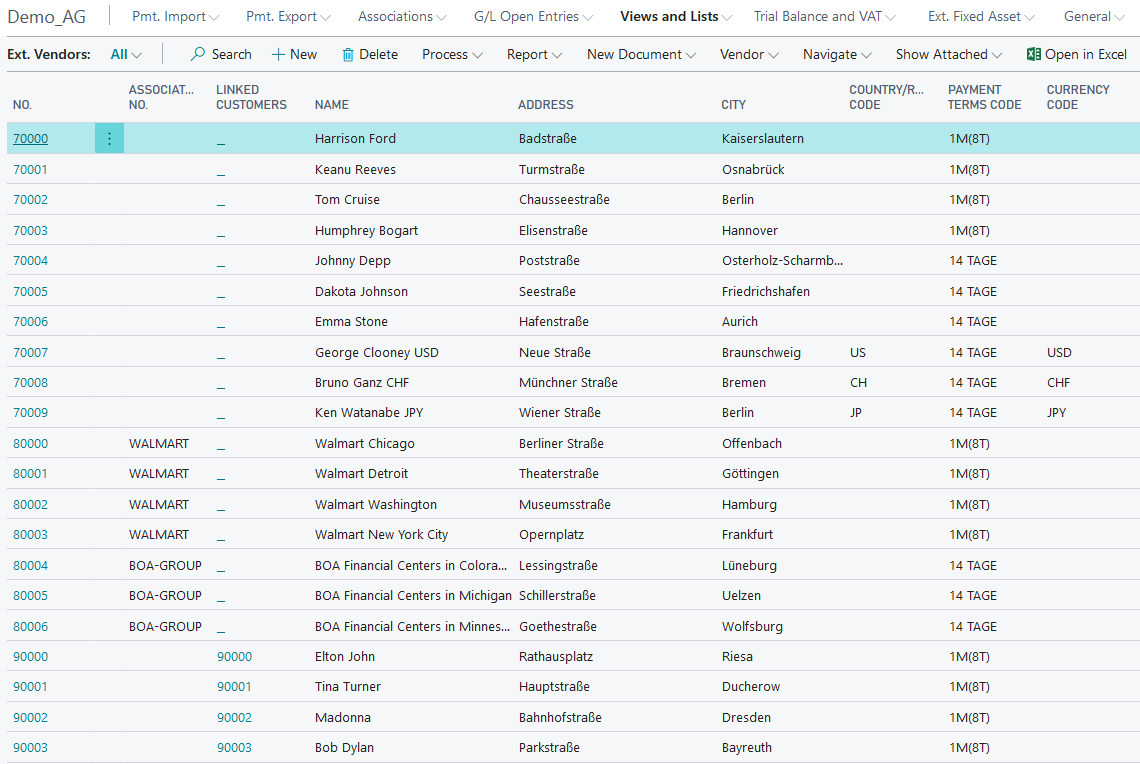
Please note that only for the country versions DE, AT and CH, the first inland customers and vendors are preassigned with a payment discount payment term.
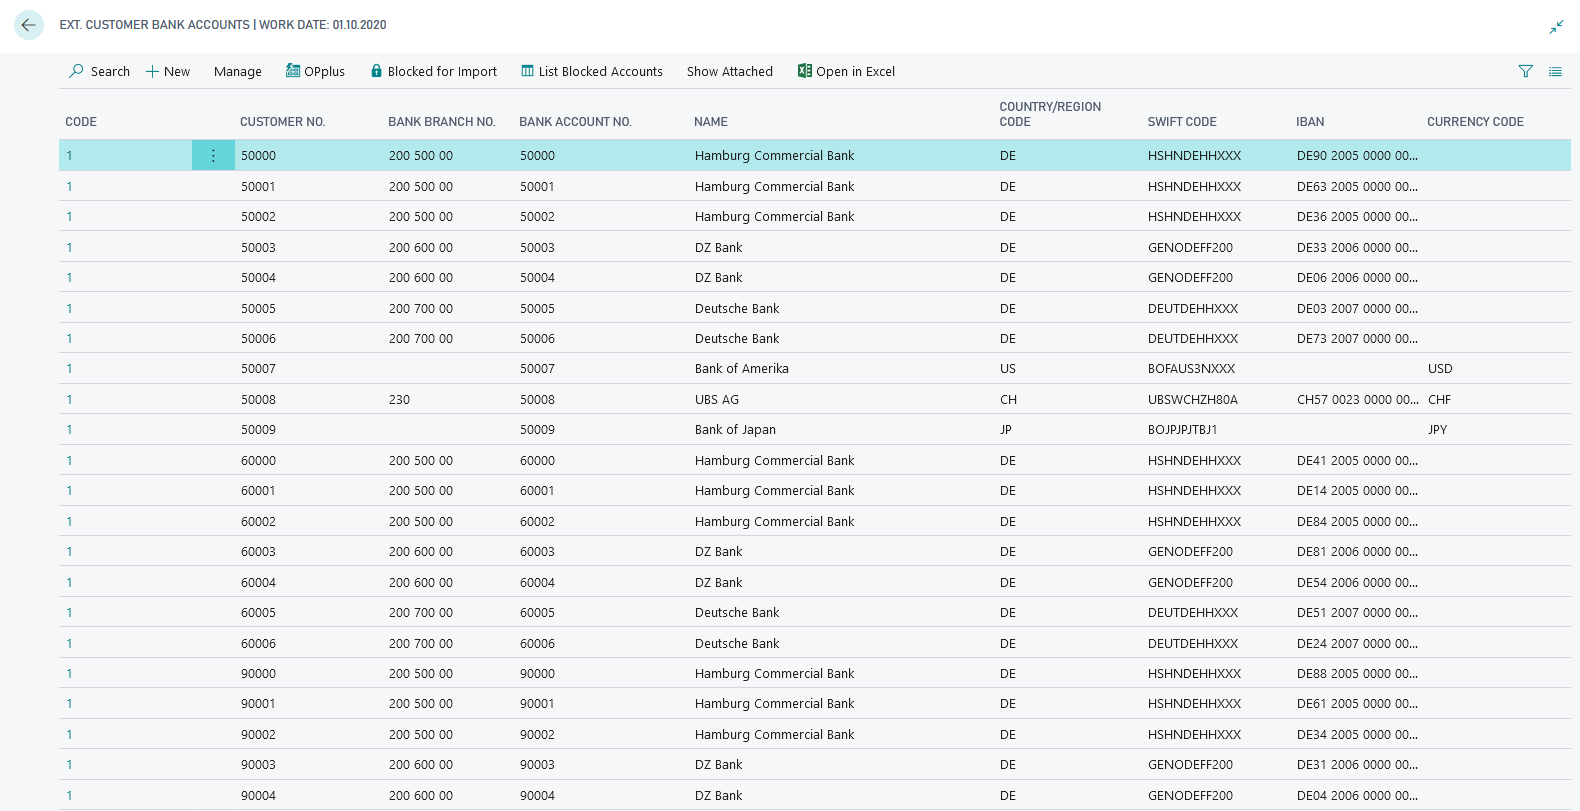
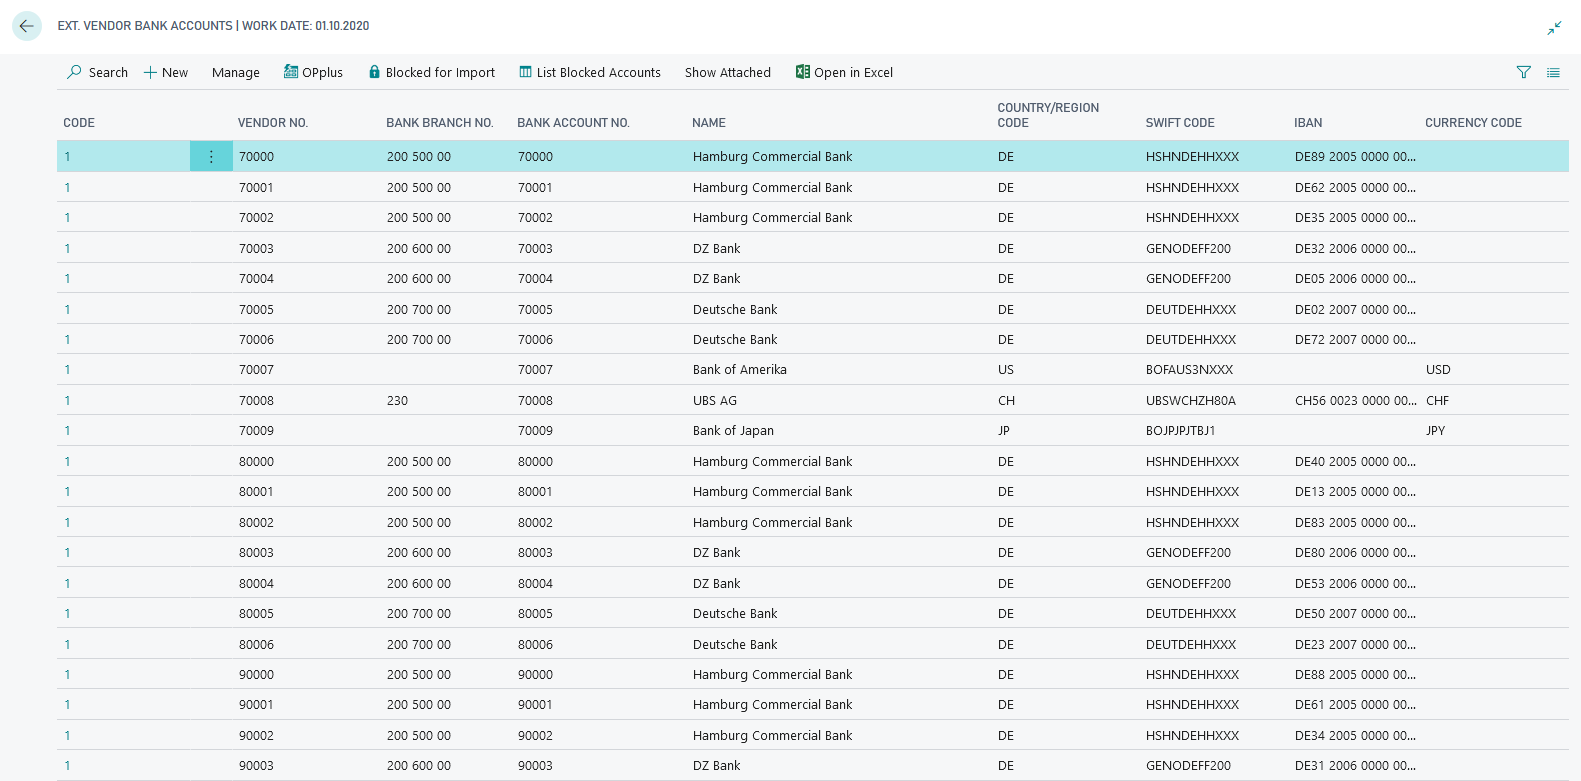
Customers/ Vendors Bank Accounts
For the presentation of the Payment Export module a bank account with corresponding bank details is set up for each of the customers and vendors. The following structure is used:
Customers 50000..50006/ Vendors 70000..70006
Bank accounts at Hamburg Comercial Bank, DZ Bank or Deutsche Bank. Following informations are given:
- Bank Code and SWIFT-Code for the corresponding Bank (State April 2020)
- Bank Account Number (corresponds to customer-/vendor number)
- IBAN (for DE: calculated from Bank Code and Bank Account Number)
- Country-/Regionscode: DE
Customer 50007 / Vendor 70007
Bank Accounts at the Bank of America. Following informations are given:
- Bank Account Number (corresponds to customer-/vendor number)
- SWIFT-Code (State April 2020)
- Countr-/Regionscode: US.
Customer 50008 / Vendor 70008
Bank Account at the UBS AG. Follwing informations are given:
- Bank Code and SWIFT-Code (State April 2020)
- Bank Account Number (corresponds to customer-/ vendor number)
- IBAN (calculated from Bank Code and Bank Account Number for CH)
- Country-/Regionscode: CH.
Customer 50009 / Vendor 70009
Bank Account at the Bank of Japan. Following informations are given:
- Bank Account Number (corresponds to customer-/vendor number)
- SWIFT-Code (State April 2020)
- Country-/Regionscode: JP.
Customers 60000..60006 / Vendors 80000..80006
Bank accounts at Hamburg Comercial Bank, DZ Bank or Deutsche Bank. Following informations are given:
- Bank Code and SWIFT-Code for the corresponding Bank (State April 2020)
- Bank Account Number (corresponds to customer-/vendor number)
- IBAN (calculated from Bank Code and Bank Account Number for DE)
- Country-/Regionscode: DE
Customers / Vendors 90000..90006
Bank accounts at Hamburg Comercial Bank, DZ Bank or Deutsche Bank. Following informations are given:
- Bank Code and SWIFT-Code for the corresponding Bank (State April 2020)
- Bank Account Number (corresponds to customer-/vendor number)
- IBAN (calculated from Bank Code and Bank Account Number for DE)
- Country-/Regionscode: DE
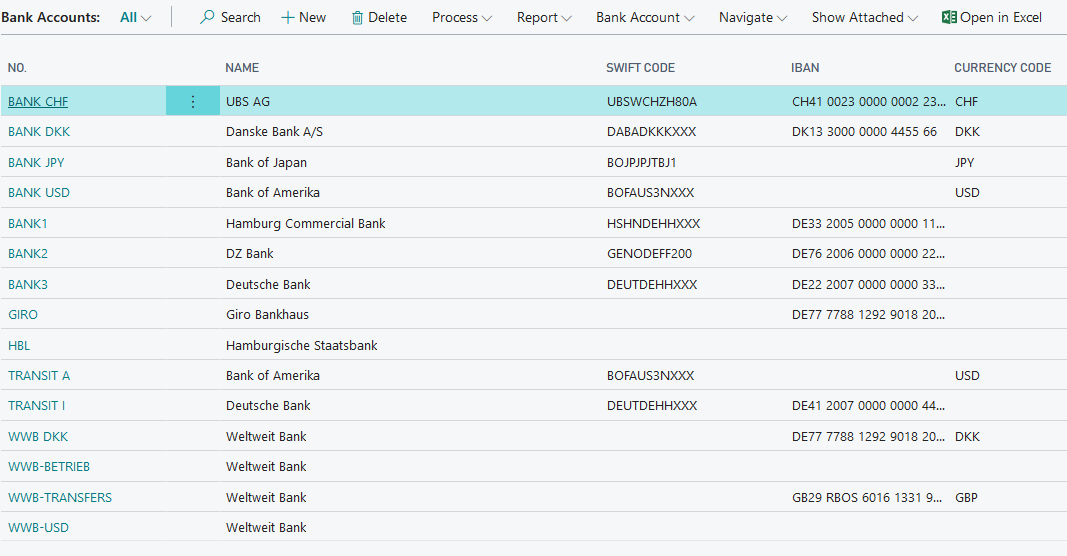
Bank Accounts
To show the functions of the Payment Export module different ordering banks with different currency codes are created.
Bank1, Bank2, Bank3, Transit I
- Bank Accounts at Hamburg Commercial Bank, DZ Bank and Deutsche Bank
- Bank Code and SWIFT-Code for the corresponding Bank (State April 2020)
- Bank Account Number (fictitious number)
- IBAN (calculated from Bank Code and Bank Account Number for DE)
- Currency Code blank
- Country-/Regionscode: DE
Bank CHF
- Bank Account at UBS AG
- Bank Code and SWIFT-Code for the corresponding Bank (State April 2020)
- Bank Account Number (fictitious number)
- IBAN (calculated from Bank Code and Bank Account Number for CH)
- Currency Code CHF
- Country-/Regionscode: CH
Bank DKK
- Bank Account Danske Bank A/S
- Bank Code and SWIFT-Code for the corresponding Bank (State April 2020)
- Bank Account Number (fictitious number)
- IBAN (calculated from Bank Code and Bank Account Number for DK)
- Currency Code DKK
- Country-/Regionscode: DK
Bank JPY
- Bank Account at Bank of Japan
- SWIFT-Code of Bank of Japan (State April 2020)
- Bank Account Number (fictitious number)
- IBAN and Bank Code blank
- Currency Code JPY
- Country-/Regionscode: JP
Bank USD, Transit A
- Bank Account at Bank of America
- SWIFT-Code of Bank of America (State April 2020)
- Bank Account Number (fictitious number)
- IBAN and Bank Code blank
- Currency Code USD
- Country-/Regionscode: US
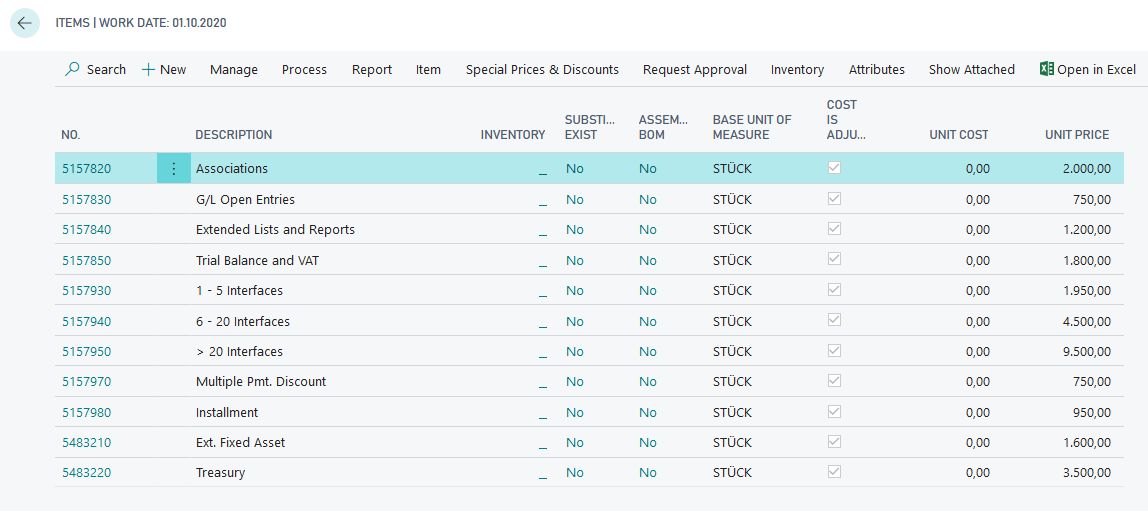
Items
Next to the master data of customer-, vendor- and bank data the setup of OPplus leads to an already setup item master data for your demo purposes, which you are able to use as part of your presentation.
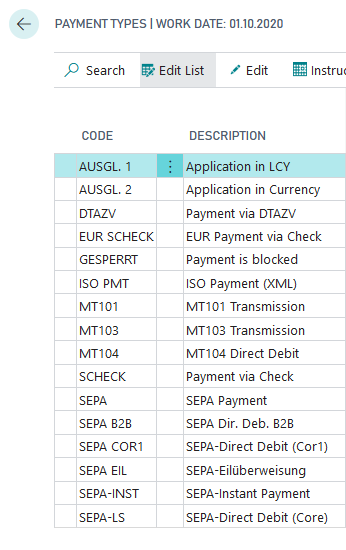
Payment Types
The payment types (including payment methods) that are important for your presentation of the OPplus Payment Export module are created by executing the OPplus Setup. The following important payment types are implemented:
Payment Methodes
The standard table of payment methods has been extended with the OPplus payment methods. The Cronus and OPplus setup creates the payment methods and the extended OPplus payment methods for presentation purposes in the demo tool:
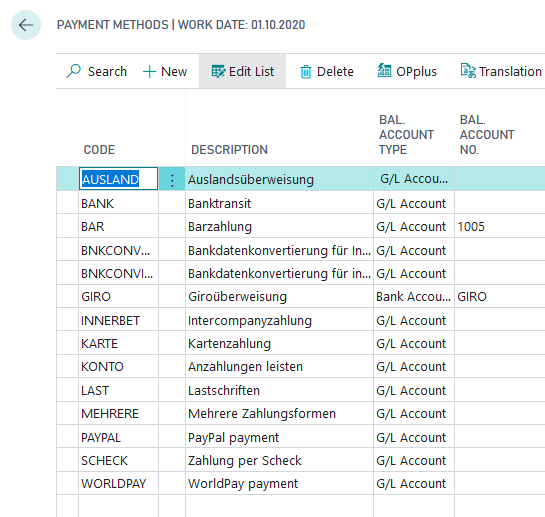
If the report is started with a country version other than DE, the created master data as well as the company data will also be adjusted according to the selected country version.
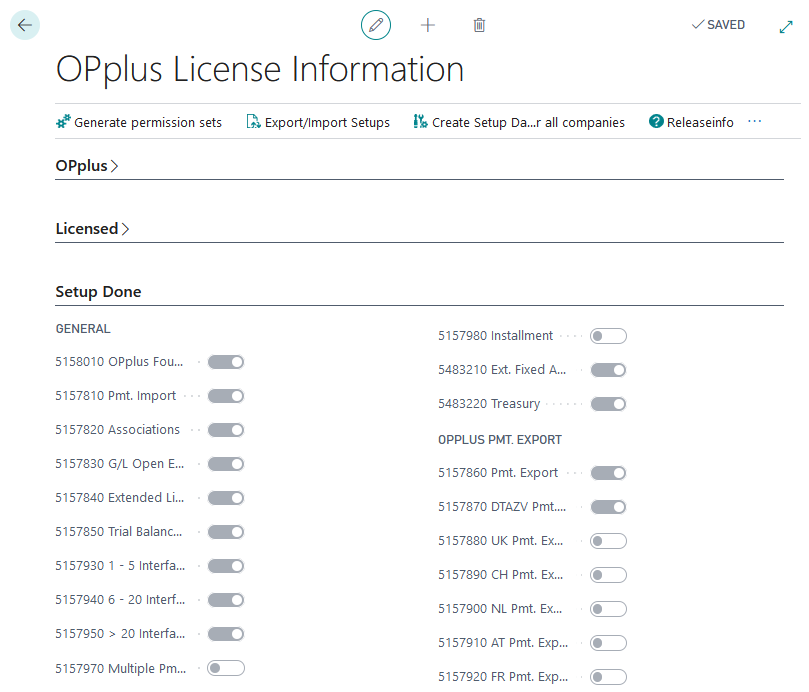
Using the OPplus license information you can see which OPP modules are licensed and which modules have been set up:
In the Setup tab of the "Create demodata" report, you will find the "Reset master data" option. The selection "Delete transaction data" can be found in the Options tab of the report. These buttons can be used to reset the transaction and master data generated by the setup and the transactions that may have been made - for example, after a presentation has been made - to their origin. The master data will then be available in its original form for further demo purposes; transaction data that have been created will be deleted.
In the following, generating customer and vendor items necessary for your demo purposes will be discussed. You can generate these items by using the functionalities in the "Postings" tab of the demo data report.
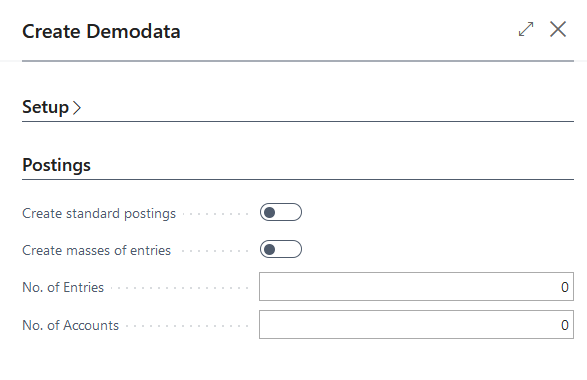
Postings
Within the Postings tab you will find functions with which you are able to generate and post entries according to the existing master data. You can choose between "create standard postings" or "create masses of entries".
By choosing the option "Demo mode" you get shown the created journals which you are able to post afterwards. Is this option deactivated, the journals will be posted automatically.
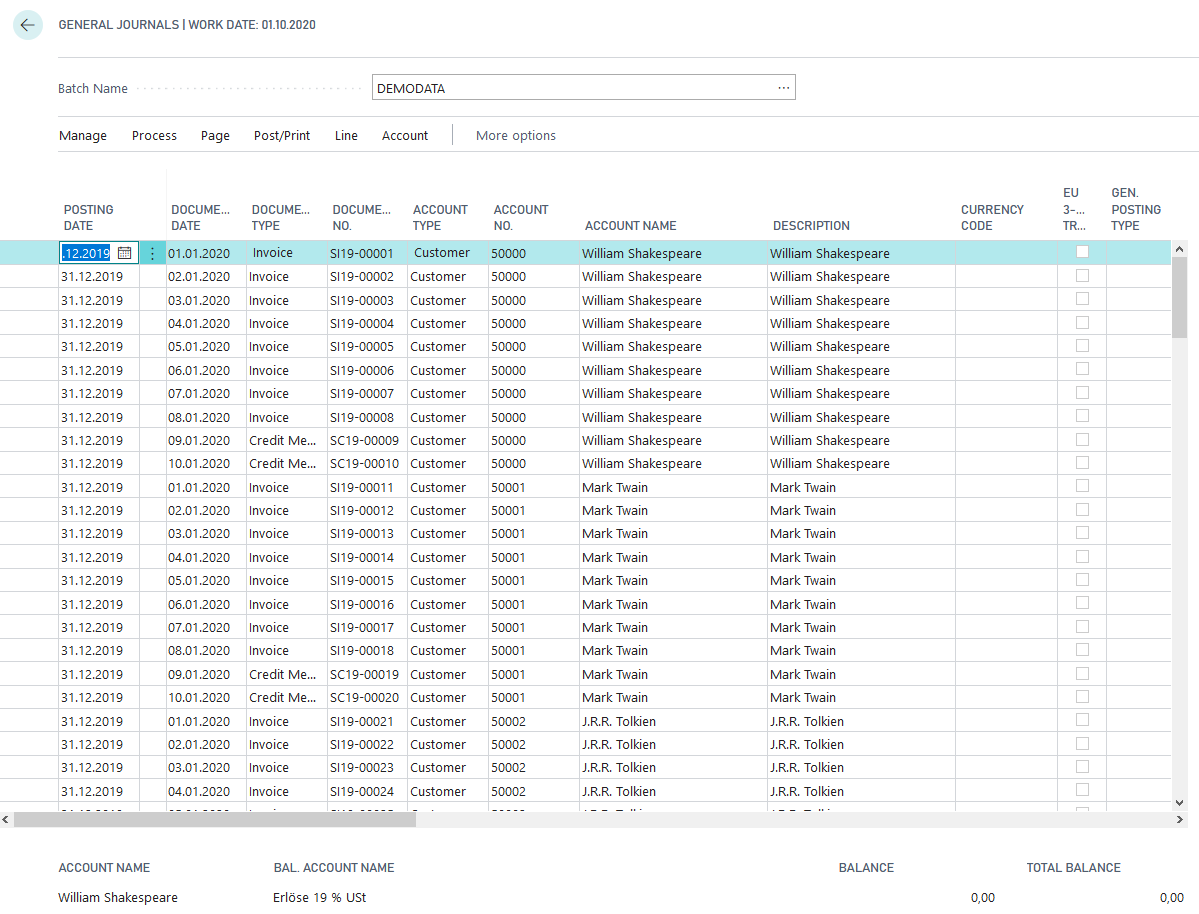
Create Standard Postings
Activate the checkbox and the systems creates the postings corresponding to the already set up accounts in the Gen. Journal Demodata. There will be two times ten postings (each eight invoices and two credit notes) per account. Starting from the working date, following logic applies regarding document- and posting dates:
- 10 postings with posting date 31.12. of the previous year (to have a balance carried forward)
- 10 postings with posting date
- last of previous month, when posted from the 15th or
- last of the pre-previous month, when posted from the 15th and only if the current month is at least February
- The document date always starts with the posting date +1D and is then incremented by one day.
The currency and the purchase or sales account is derived from the corresponding personal account. The document no. starts with SI resp. SC for sales invoices resp. sales credit notes and is analog to PI resp. PS in purchase. Then the year numbers, a hyphen und a consecutive number follow.
Create Masses of Entries
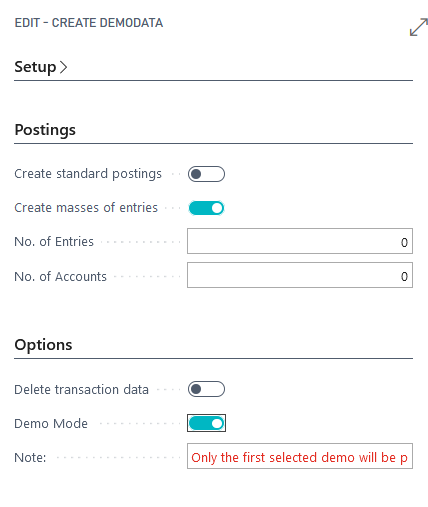
Mark this checkbox and you need to type in the number of entries you would like to create. Furthermore the system creates the Gen.-Journal Demodata, which contains corresponding many data sets. The logic behind is the same as for "Create standard postings". Means, depending on the "number of entries" always 8 invoices and 2 credit notes are generated. You also have the possibility to specify the number of accounts so that entries are only created for the specified number of accounts.