Creating a single mandate
Mandate Card
Mandates are managed in a separate table, where they can be created manually or automatically for both customer and vendor purposes.
Open the Mandates list and select +New. Alternatively, you can also create individual mandates directly in the Customer Card via the Create Mandate... process or in the Customer Bank Account via the Create Mandate... action.
Note
Find out the meaning and functions of the individual fields from the tooltips that are stored in the application. The tooltips appear when you move the mouse over the label of the respective field.
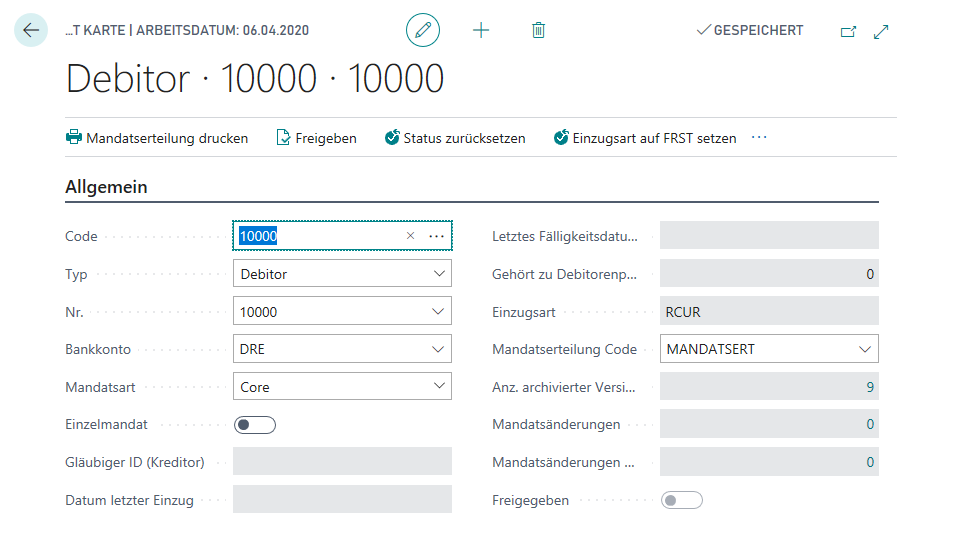
Give the mandate a unique identifier in the Code, which is max. 20 characters long. To be able to support an automatic assignment of mandate numbers, the length of the mandate Code has been limited accordingly. The Code is also the mandate reference for the direct debit consent.
Permitted characters for the mandate code:
| Character | Value |
|---|---|
| Numers | 0 to 9 |
| Capital Letters | A to Z |
| Small Letters | a to z |
| Apostrophе | " |
| Colon | : |
| Question Mark | ? |
| Komma | , |
| Minus | - |
| Space | |
| Left Bracket | ( |
| Right Bracket | ) |
| Dot | . |
| Plus | + |
| Slash | / |
Note
In the mandate number you can include the customer number. If you want to use this function and / or use several mandates per customer, store this in the SEPA DD Setup in the Mandate tab.
After assigning the Code you choose the Type. Possible are Customer or Vendor, and select the corresponding No.. From the list of bank details stored for the specified customer/vendor, you now select the corresponding bank account. Only one mandate can be stored for each bank account.
The Mandate type selected is used to determine the periods for the due date calculation; you have set the associated parameters in .SEPA DD Setup in tab Mandate.
Select from:
- Core for SEPA-Basic-DD,
- B2B for SEPA-Company DD,
- Cor1 for old Cor1-Mandate.
Important
With SEPA version 3.0 DK, since November 2016, only the mandate types Core and B2B are permitted in Germany; Core receives the same execution periods as Cor1, which was also possible until then.
If you want to use the mandate for a one-time collection, set the Single Mandate switch to Yes; the Debit type will then automatically be set to OOFF.
For verification purposes, you also have the option of storing the mandates you have issued in Business Central. For these mandates, you store the Creditor ID of the customer to whom you have issued the mandate. This information is then transferred to the bank statement line for verification.
The Date last debit field is automatically filled or updated when the payment associated with a direct debit is posted. As a rule, the date of the last direct debit in which the mandate was used can be found here.
When posting a direct debit in which the mandate is used, the Last Due Date SEPA of the payment is filled in the field with the same name. You will also see the number of the customer ledger entry of the last payment in which the mandate was used in Applies-to Cust. Ledg. Entry.
The field Debit type is filled automatically when direct debit is used:
- FRST: first usage
- RCUR: recurring usage
- FNAL: last usage
- OOFF: single
Tip
With SEPA version 3.0 DK, since November 2016, first collections in Germany may also be provided with the collection type RCUR; DK (Deutsche Kreditwirtschaft) recommends this procedure.
Then use the Mandate delegation Code to specify which text you want to use for the mandate delegation text. If you leave the field empty, the default entered in the SEPA DD Setup in the Mandate tab will be used.
Then print the mandate with the action Print mandate directly from the mandate. You can also use the search function to access the Print mandates report.